If your QuickBooks Desktop sync with STRATAFOLIO stops working, you can quickly reconnect and restore your data flow by following a simple process. This guide walks you through how syncing works, why it may break, and exactly how to fix it step by step. By the end, you will understand how to safely run a sync, verify success, and troubleshoot issues with confidence.
Overview
STRATAFOLIO connects to QuickBooks Desktop through a controlled sync process. QuickBooks remains your source of truth, and STRATAFOLIO reads your financial data from it.
Unlike cloud software, QuickBooks Desktop does not sync automatically in the background. You must manually run the sync using the QuickBooks Web Connector. When the sync breaks, it usually means the connection needs to be refreshed, or the process was interrupted.
This guide helps you safely reconnect and complete a successful sync without risking your accounting data.
Things That Will Break Your QuickBooks Desktop Sync
Once your QuickBooks Desktop file is linked to STRATAFOLIO, a few actions can permanently break the connection. Avoiding these will help you prevent sync failures before they happen.
Download the QBD Sync Breaking Points Reference Sheet for more guidance.
How to Reconnect and Run a Successful Sync
Follow these steps exactly to reconnect and run a successful sync.
Step 1: Log into Your Host Server
If your QuickBooks Desktop is hosted on a server, log into that environment first. This ensures you are working in the correct system.
Step 2: Close All Other Company Files
Make sure all QuickBooks company files are closed and no one else is logged into any company. This prevents sync conflicts and failures.
Step 3: Open the Correct Company File
Open the QuickBooks company file you want to sync. Always use single-user mode for best results.
Step 4: Open the Web Connector
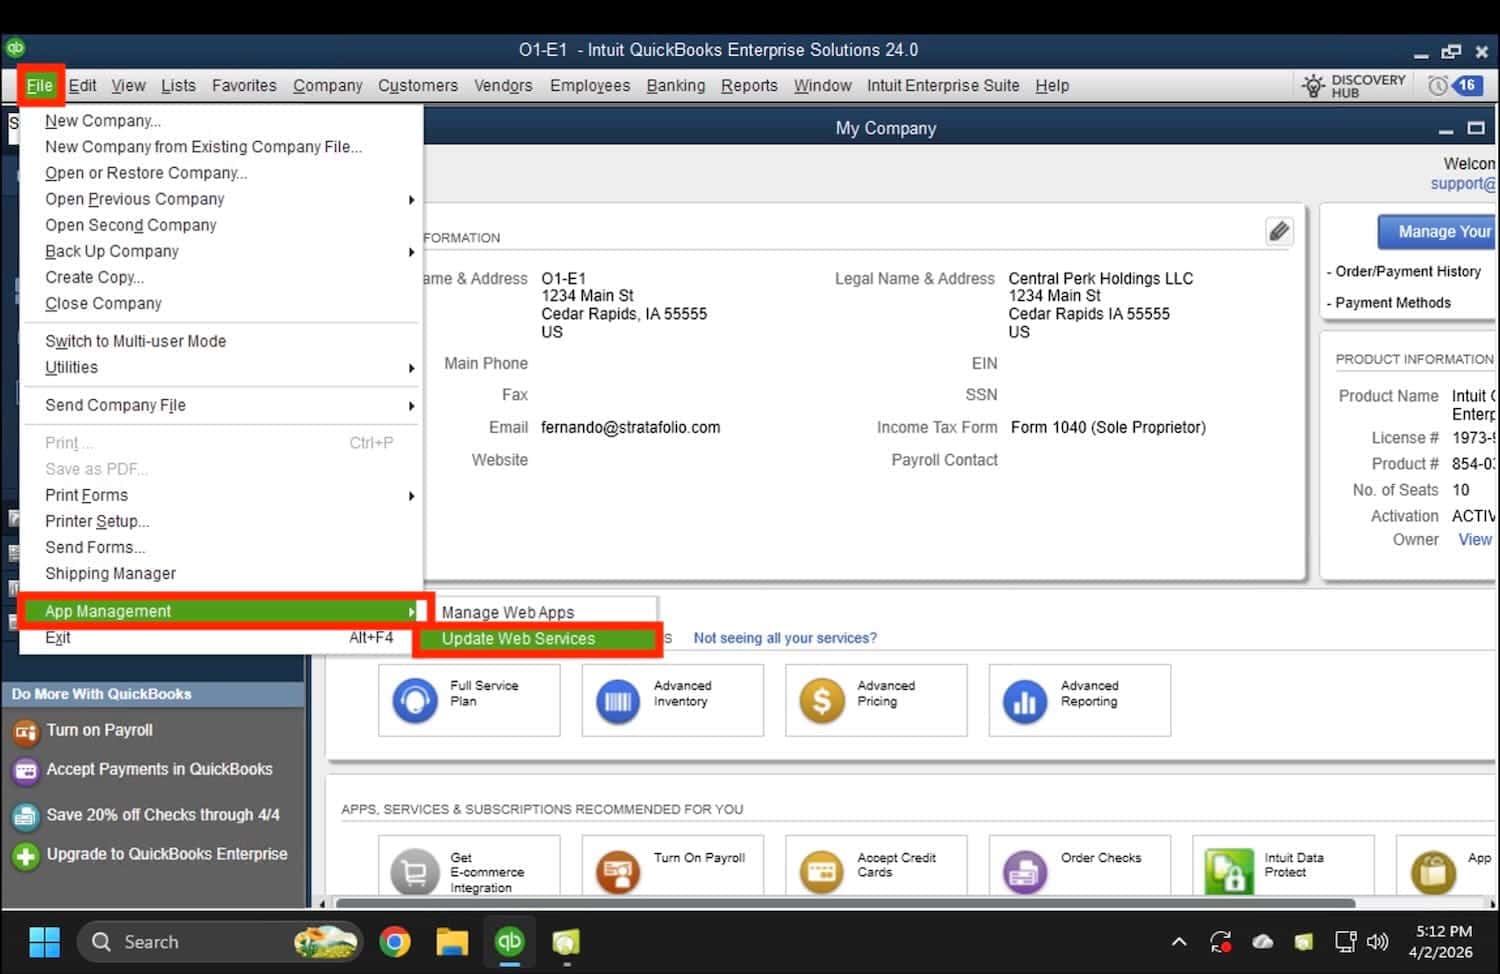
Go to File and select Update Web Services to open the Web Connector.
Step 5: Select the Correct STRATAFOLIO Integration
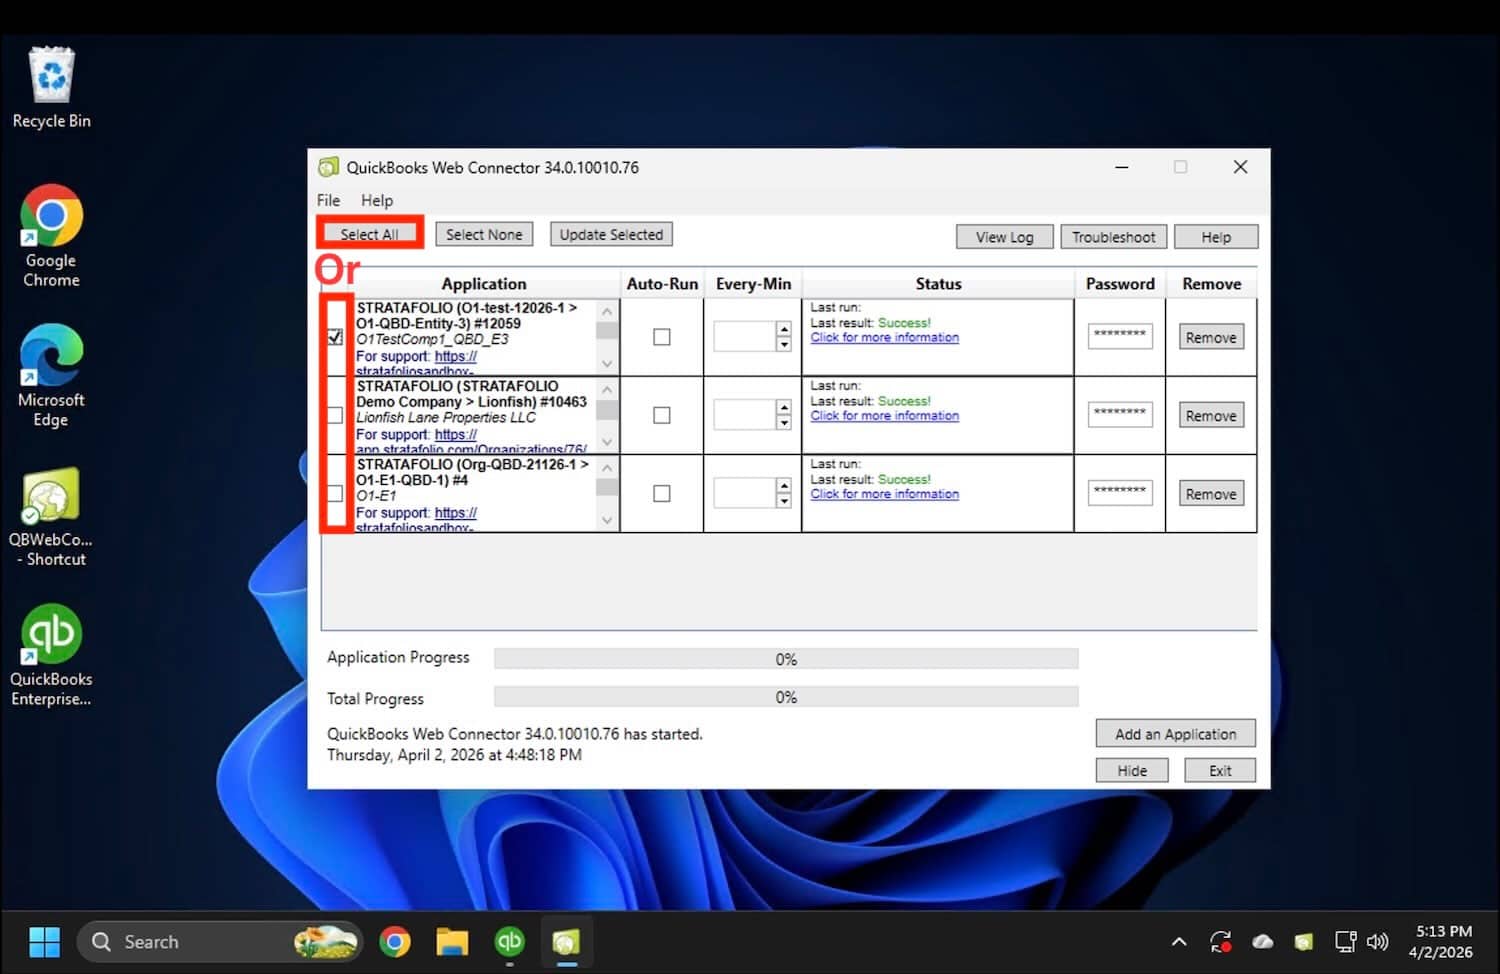
Find the STRATAFOLIO integration that matches the company file you currently have open. Check the box next to that integration. Choose Select All if you are syncing in bulk.
Step 6: Click Update Selected
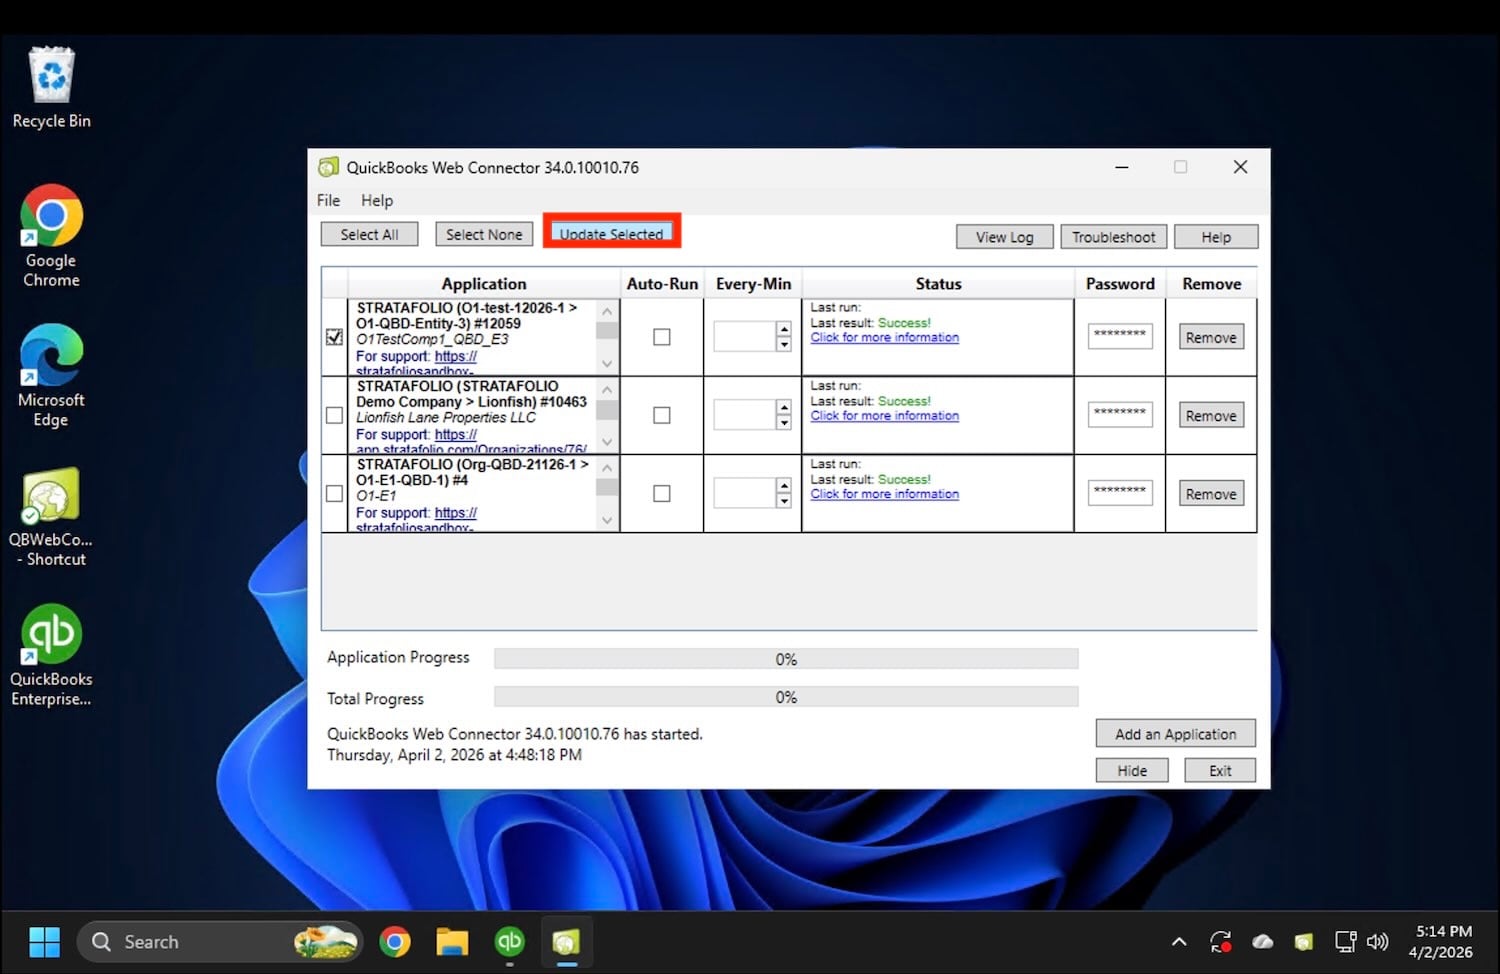
Click the Update Selected button to begin the sync process.
Step 7: Wait for Completion
The sync will begin immediately. Do not click anything else while it runs. Large files may take several minutes to complete.
Step 8: Confirm Success
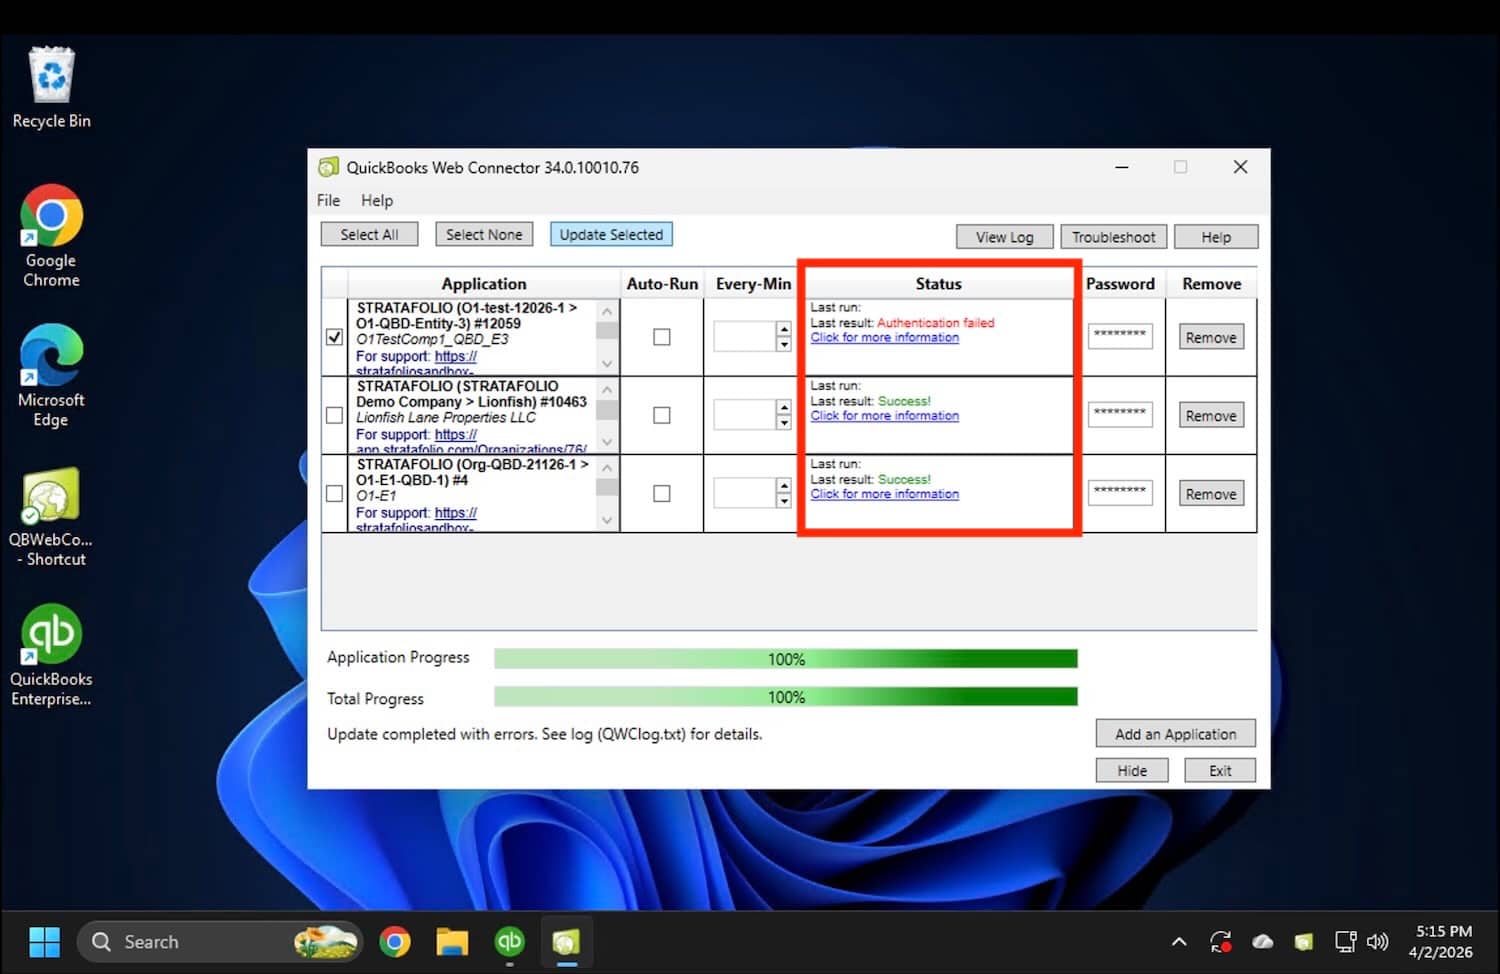
Look at the Status column. If the sync worked, you will see “Last result: Success!”
Step 9: Close the Company File
Once complete, you can safely close the QuickBooks company file. For every company with an issue, restart the process beginning from step 3.
What Happens During the Sync
When you run a sync, STRATAFOLIO pulls financial data from QuickBooks. This includes transactions, balances, and account data.
You may notice:
– Progress bars are moving slowly
– Longer wait times for large files
– No visible changes in QuickBooks
This is normal. Always allow the sync to complete.
How to Tell If the Sync Worked
You can confirm success in two places:
Web Connector
Look for “Last result: Success!” in the status column.
STRATAFOLIO
Go to Hierarchy on the left-side navigation menu, then Organizations. Click the i icon to view the Organization’s detailed view. Check the Integrations tab for the latest sync status.
If both show success, your data is up to date.
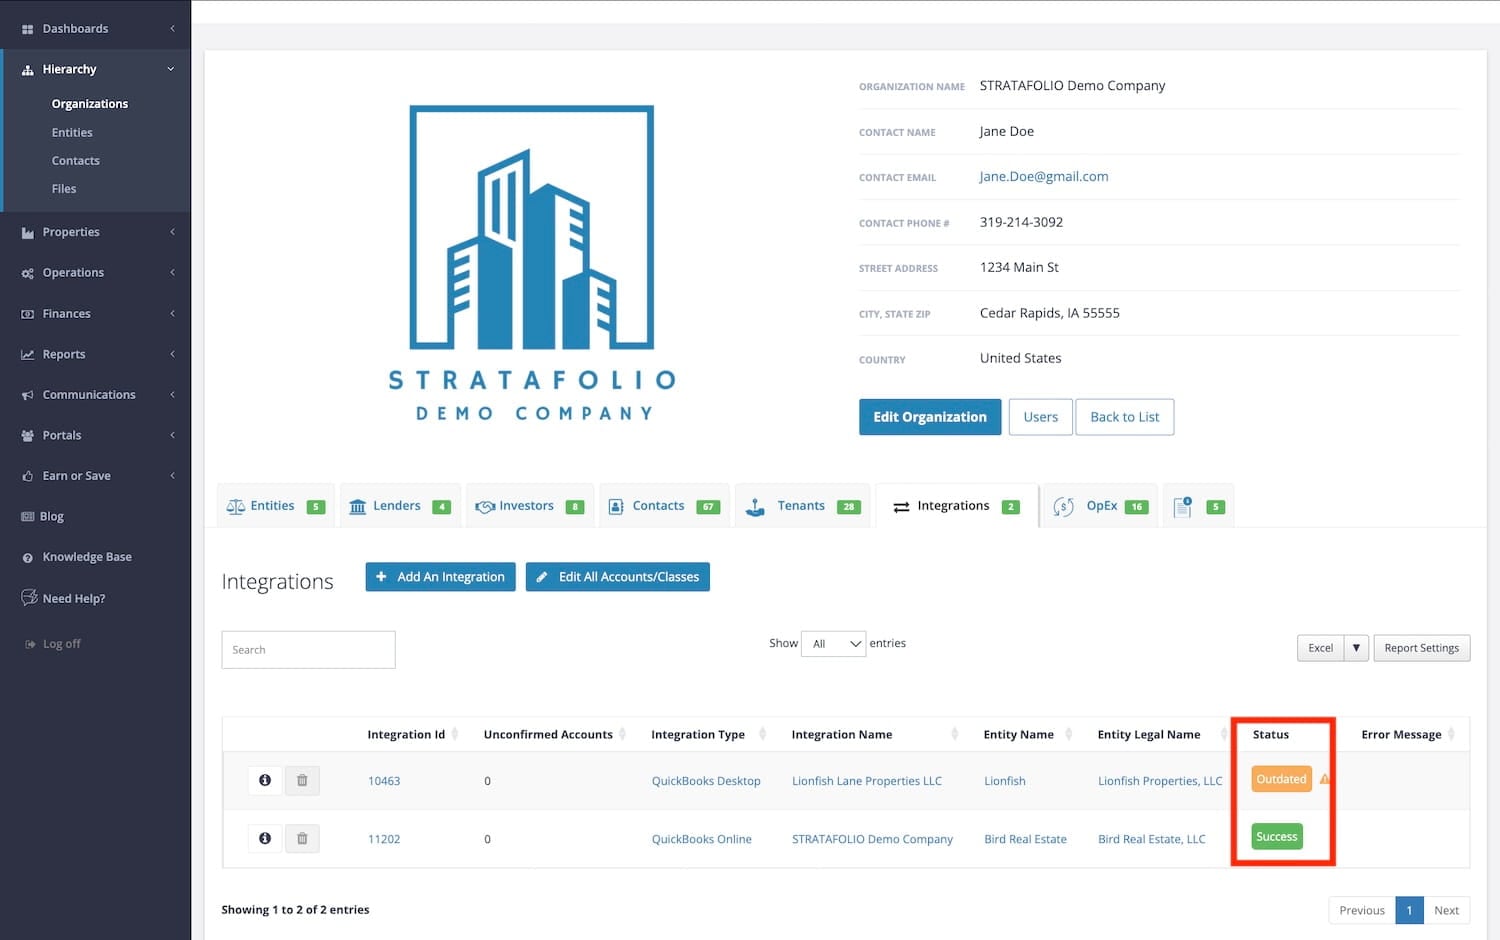
Why this matters: A single failed sync can stop certain records, like invoice balances, from updating. Later syncs can still show success. Checking the Integrations tab after every sync catches this early.
What to do if QuickBooks Desktop Won’t Sync
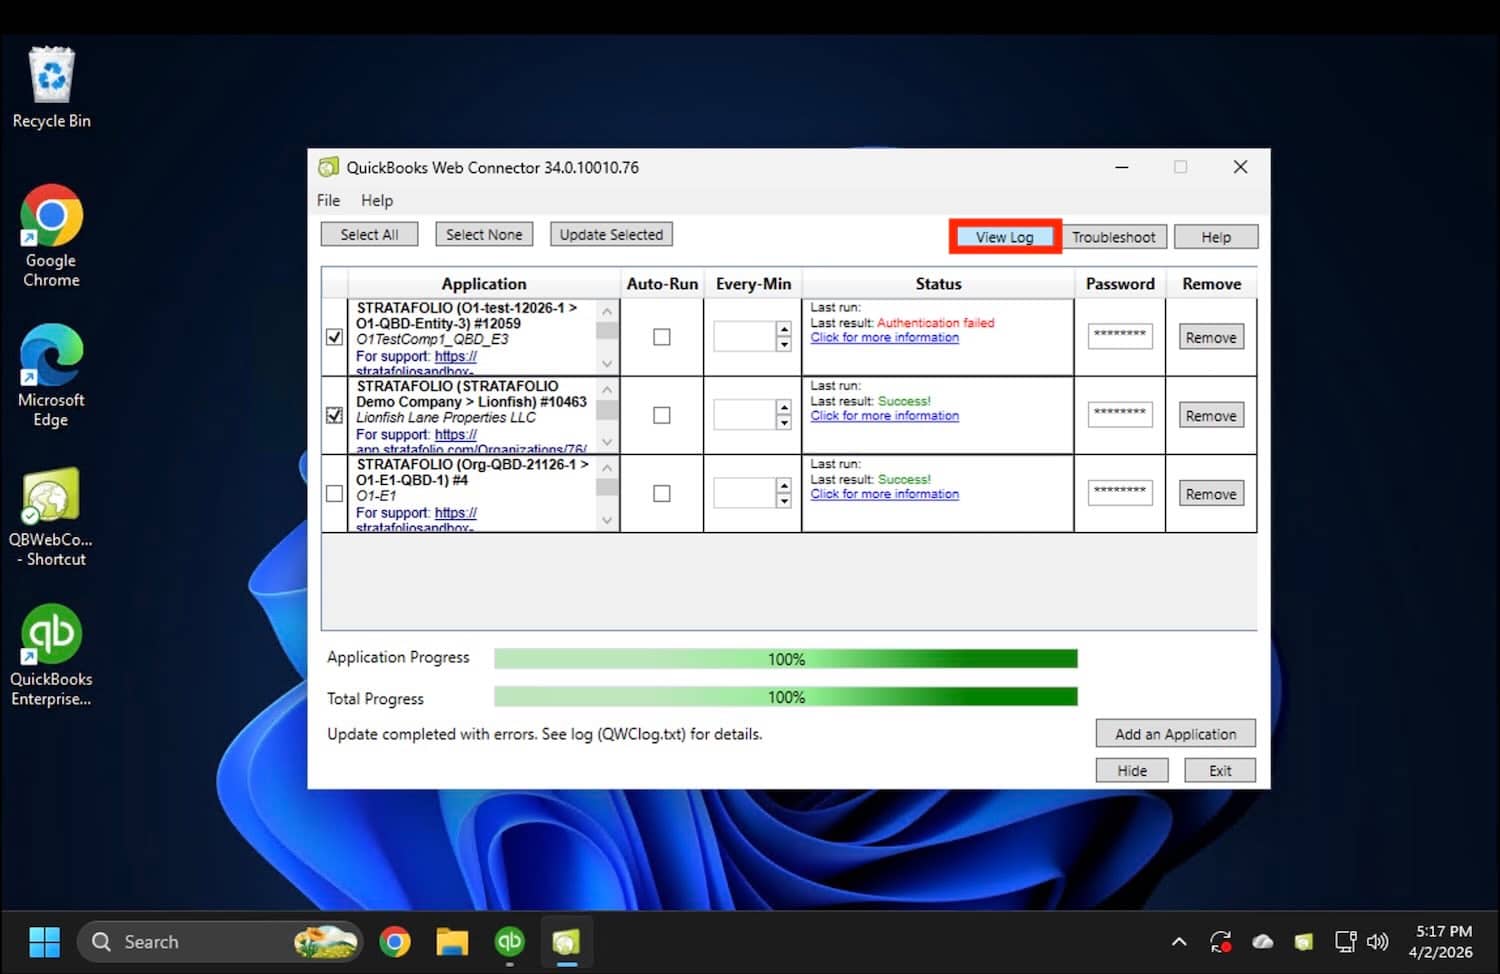
If the steps outlined in this article still do not work, click View Log in the Web Connector application, then save the file to your computer. Submit a ticket and attach the file. The team will respond within 24 hours.
The Sync Shows Success, but the Accounting Customer List Is Empty
Sometimes the sync says Success, but the Accounting Customer dropdown is empty when you edit a lease. This usually means the lease is entered in one Entity, but your QuickBooks Desktop integration is connected to a different Entity. Customers and Income Items only show for leases in the same Entity as the integration. This can happen when your account has two Entities with the same legal name but different names.
How to Check
Go to Hierarchy, then Organizations, and select the i icon next to your Organization. Open the Integrations tab, select your QuickBooks Desktop integration, and look at the Entity name at the top of the page. Open the Customers tab to confirm your customer is listed.
Next, go to Operations, then Leases. Open the lease, select Edit Lease, and look at the Entity name at the top of the page.
If the two Entity names are different, you have found the cause.
How to Fix It
You have two options.
Option 1: Move the lease to the Entity that has the integration.
Remove the lease from its current Entity and add it to the Entity with the QuickBooks integration. Then edit the lease and choose your Accounting Customer. Contact Support before you remove a lease so your lease notes, files, and history are kept safe.
Option 2: Create a new integration for the Entity the lease is in.
Set it up using How To Add a New QuickBooks Desktop Integration to STRATAFOLIO, then request that the account be purged and wait for the process to be completed. A new integration needs a full remapping of your chart of accounts, leases, loans, and income items.
If you are not sure which option is right for you, submit a ticket before making changes. Include your Organization name, both Entity names, and the lease name.
Troubleshooting: My invoice balance in STRATAFOLIO does not match QuickBooks
The fix is to run a sync, confirm success in both Web Connector and the Integrations tab, and submit a ticket if the balance is still wrong. The support team can trigger a full resync.