Classes are the easiest way to keep track of multiple assets/properties in one QuickBooks account. Using classes helps create a more manageable—and more easily navigated—Chart of Accounts (COA). In QuickBooks, not only can you track your expenses, but you can also use classes to identify the type of expenses incurred for each asset easily. This, in turn, helps you prepare more accurate financial statements that reflect the true financial position of your business.
Mapping Chart of Accounts in STRATAFOLIO
Before you begin mapping the classes, it is important to first map all of the General Ledger/Chart of Accounts for each QuickBooks account that is integrated. This will ensure that your mapping process is smooth and accurate. By taking this step, you can avoid any confusion or errors that may arise later in the process. Once you have mapped the Chart of Accounts, you can then move on to mapping the classes with confidence. Please refer to the article for more information on how to map the COA: How to Map a New Account in STRATAFOLIO That Was Created in QuickBooks.
Mapping Classes
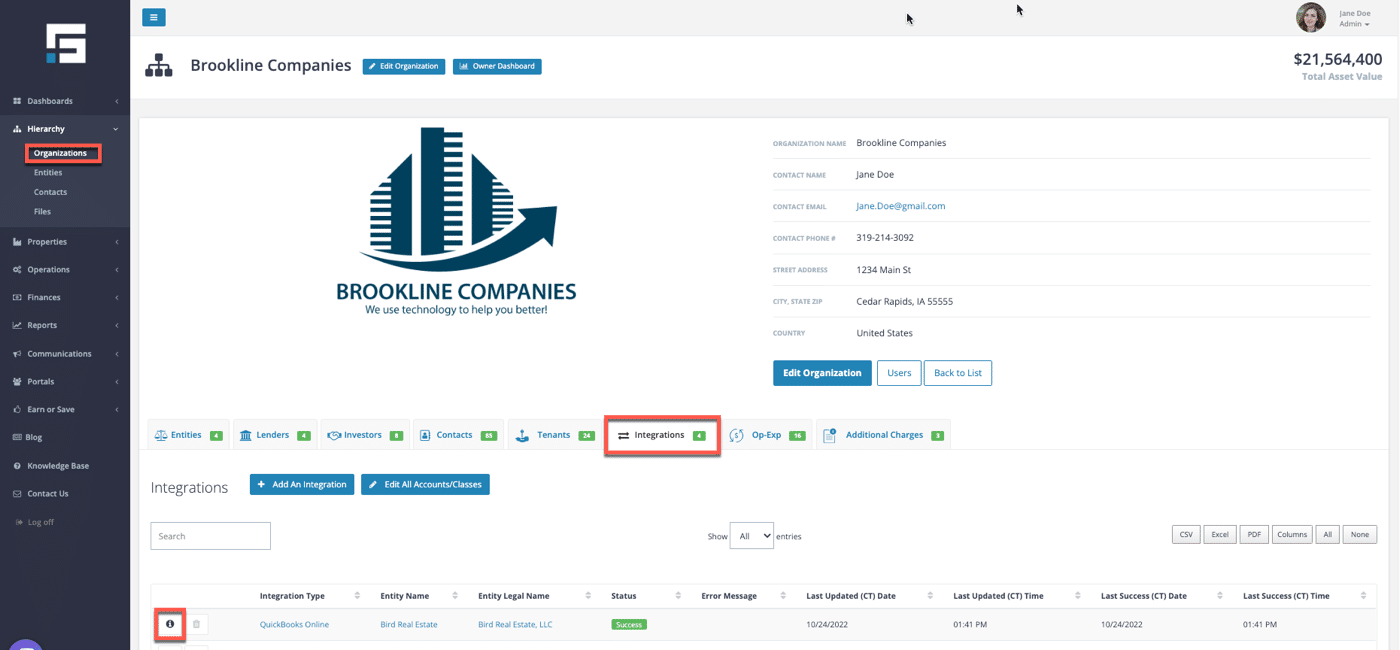
On the main Organization page, select the Integration tab. The table shows the Entities in STRATAFOLIO that are integrated with the QuickBooks accounts. Select the“i” next to the integration corresponding to the QuickBooks file that has the classes in need of updating.
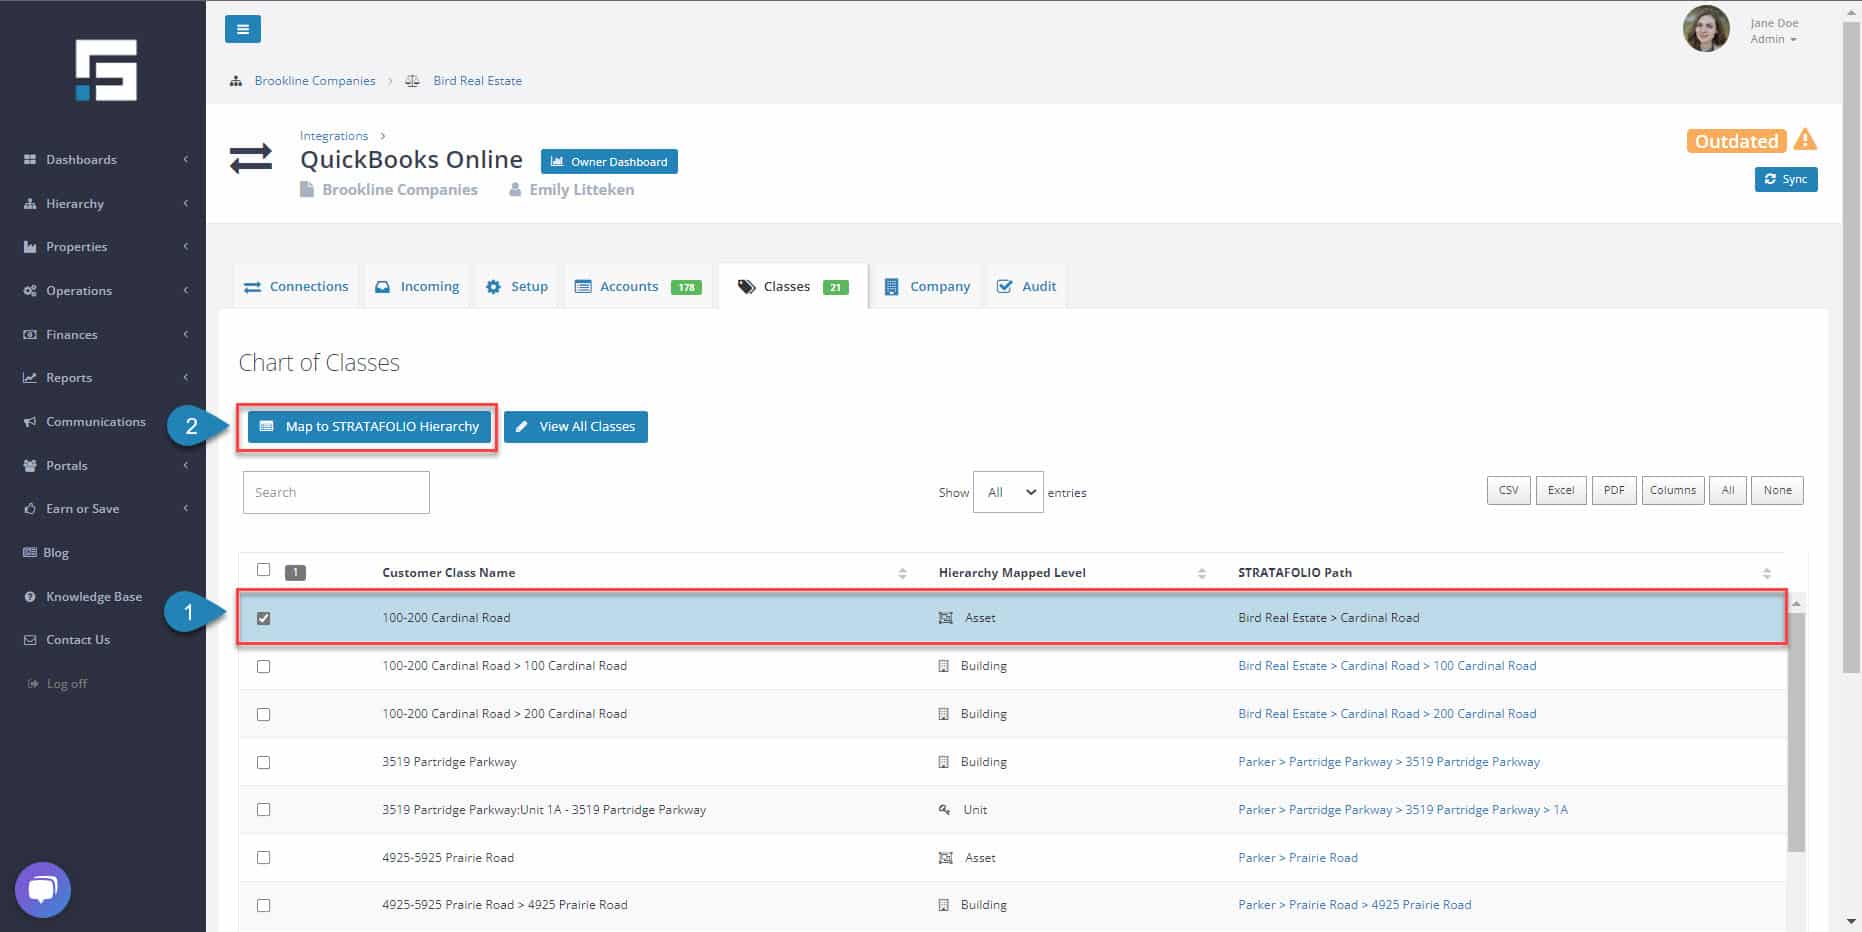
If this QuickBooks account utilizes classes, a tab will appear under the integration displaying Class and the number of classes currently in the account. Please keep in mind that the system may display all classes, including the deleted ones. Select the class that requires mapping and then select Map to STRATAFOLIO Hierarchy.
Mapping Hierarchy for Classes
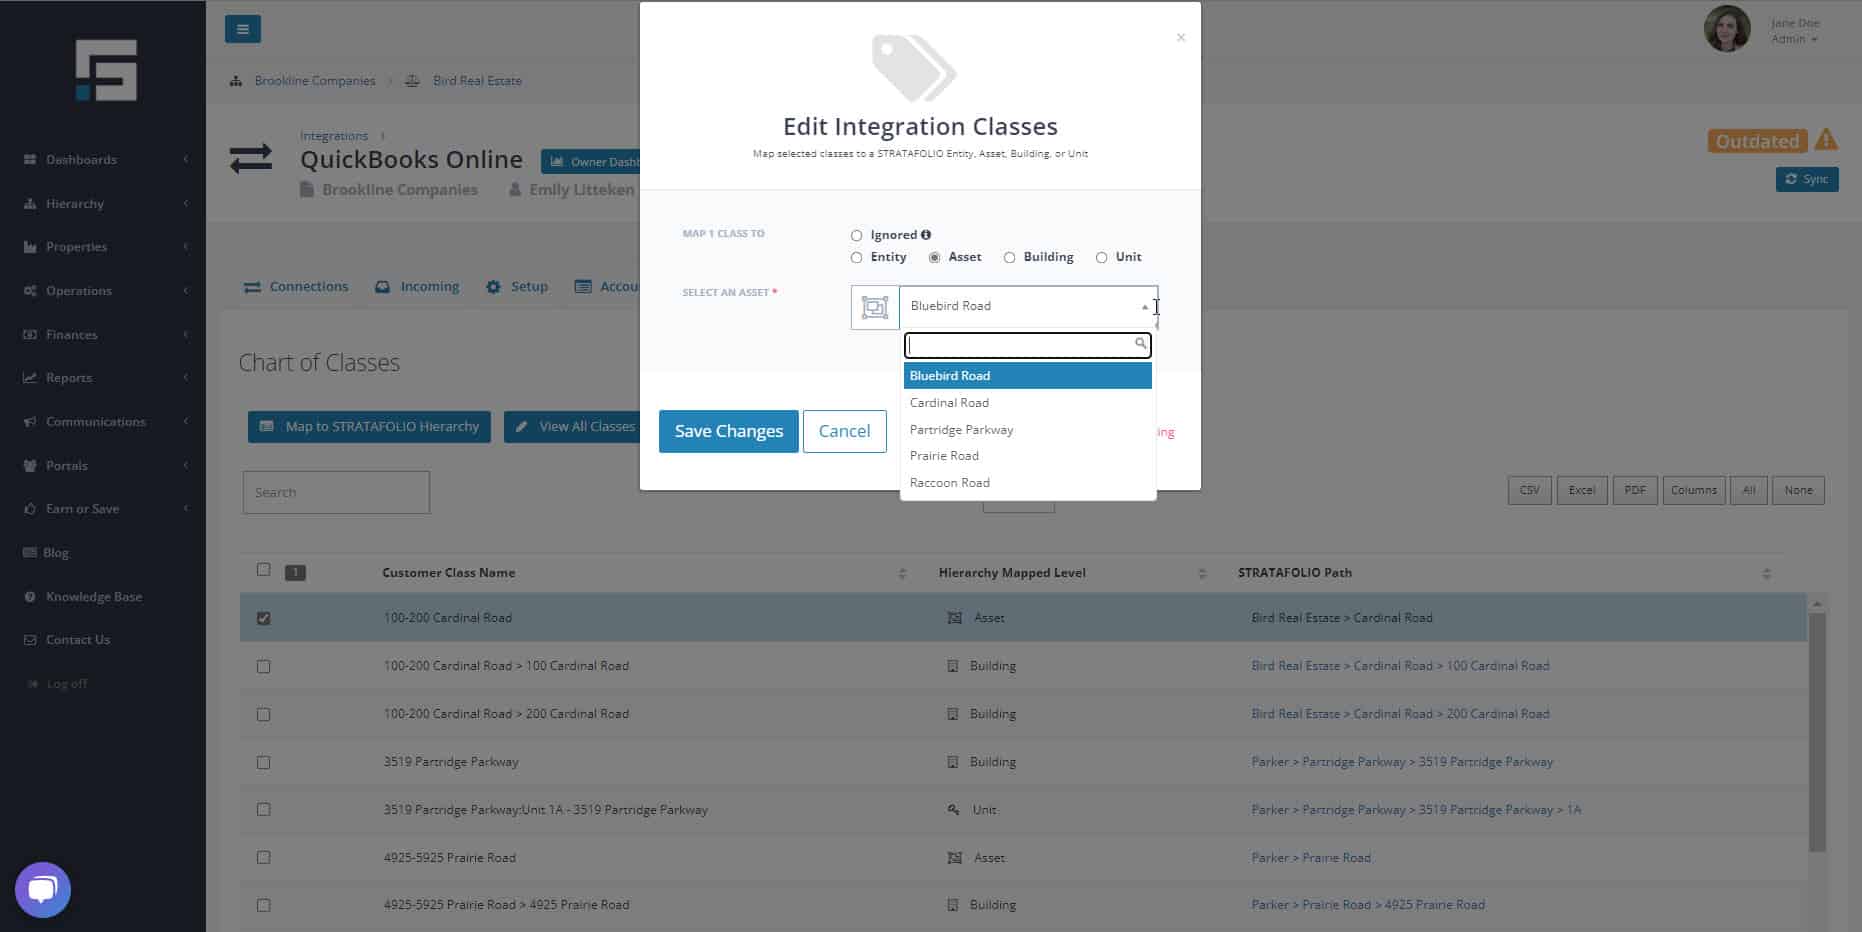
When you see a pop-up window, you will need to add the required fields. Specifically, you will need to select between the following options. It’s important to carefully consider your choices and choose the option that is best suited for your needs. Once you have made your selection, simply follow the prompts to proceed.
- Ignored – STRATAFOLIO will “ignore” all these transactions, and they will not appear on the dashboard or Operating Expense Reconciliation Reports. This does not delete or modify the transaction in QuickBooks. They are only ignored in STRATAFOLIO.
- Entity – STRATAFOLIO will allocate these transactions throughout the entire Entity.
- Asset – STRATAFOLIO will allocate these transactions across the entire selected Asset.
- Building – STRATAFOLIO will allocate these transactions only to the selected Building.
- Unit – STRATAFOLIO will allocate these transactions 100% to this one Unit.
If you select anything other than ignored, the drop-down menu will update with what you have entered in STRATAFOLIO per type. Select the proper Entity, Asset, Building, or Unit. Select Save Changes.
To begin with, please map all classes created according to the aforementioned directions. Once you have completed mapping a class, move on to the next one until you have mapped all classes and sub-classes.
Using Classes for CAM Reconciliations
It is important that if you are using the classes in QuickBooks, and are also using the CAM Reconciliation Reports in STRATAFOLIO, you use the classes on every expense transaction that you post in QuickBooks.
When you record an expense in a CAM/Reimbursable expense account in QuickBooks, assign a class to it. STRATAFOLIO will use this class to determine which Entity, Asset, Building, or Unit will receive the expense allocation during the CAM reconciliations.
If you associate an expense with a specific unit’s class, you will allocate the entire amount to that unit. Conversely, if you associate the expense with the building’s class, you will distribute it among all units within that building. This approach ensures precise tracking and allocation of expenses.
NOTE: For CAM/Reimbursable accounts, if no class is used when the expense is posted, the expenses will be allocated on a pro-rata basis across all units associated with this Integration.
A best practice is to run a Profit and Loss (P&L) monthly or quarterly to verify that all transactions are classed appropriately. We suggest adding a class for Admin or G&A so that all transactions, even the overhead expenses, have a class posted to them. This makes reconciliation at the end of the year much smoother.
If the QuickBooks accounts have new Assets, create a new Class in QuickBooks and then update the Class in STRATAFOLIO. Please remember that allocating all the transactions to the correct Entity, Asset, Building, or Unit will ensure their accuracy and proper classification.