With STRATAFOLIO, you can integrate as many QuickBooks Desktop (QBD) company files as your organization owns. This allows you the ability to have a bidirectional connection between your QBD file and your STRATAFOLIO QBD integration.
Before You Start Integrating QuickBooks Desktop
In order to add an integration, you will need to have access to the items below:
- You will need the latest version of Web Connector installed on your computer or server, and you will need to make sure Web Connector is able to write to the log file
- You will need admin rights to your QBD company files
- You will need a STRATAFOLIO admin account
NOTE: STRATAFOLIO supports the three most recent version years of QuickBooks Desktop. Intuit maintains support for only its three most recent version years, so keeping your QuickBooks Desktop within that window helps your integration and Web Connector sync continue to work reliably.
Confirm You Have QBD Web Connector Installed
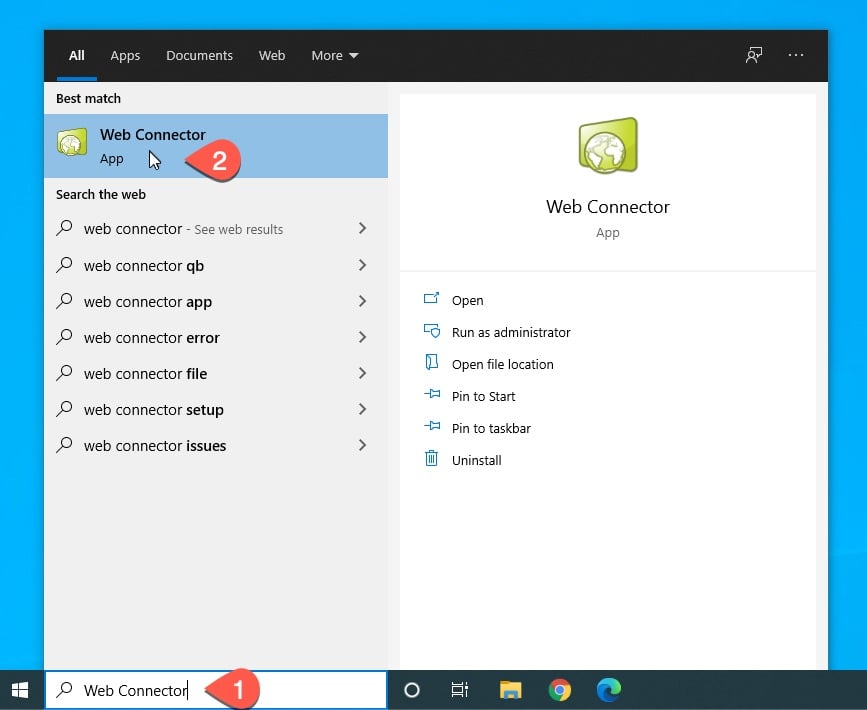
- On your device, select Start and type Web Connector.
- Select the Web Connector application by clicking on it.
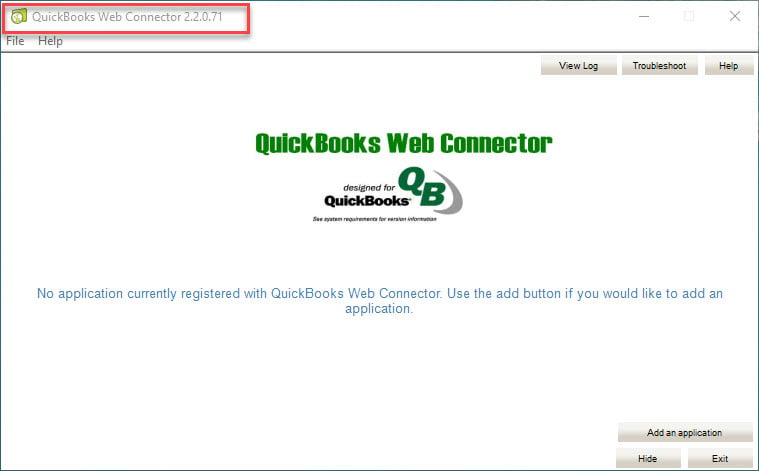
- Ensure the window title shows QuickBooks Web Connector 2.2 or newer. STRATAFOLIO can connect to Web Connector versions as low as 2.2, but we strongly recommend keeping your Web Connector up to date with the latest release from Intuit. Each Web Connector version may contain fixes and enhancements that maintain your data security. To check the latest Web Connector Version. You can check the latest version of Web Connector from the Intuit Developer Site.
- If you do not have Web Connector installed, please download it from the Intuit Developer Site and use the latest version.
Link Your Company File to STRATAFOLIO
- Identify the company name within your QuickBooks Desktop that you want to link to STRATAFOLIO.
- Select the company.
- Click on the Open button.
NOTE: To link this file, the Company File must be open, and all other windows within QuickBooks must be closed.

Download the Web Connector Configuration file
This file will initiate the process of linking your QuickBooks company file for your legal entity (Fletcher) with STRATAFOLIO.
If you have multiple users who need to update the Web Connector, then you can add them by repeating the steps below.
To obtain the file, download the file by clicking on the Authorize New Computer button from the Integrations Setup tab.

Add Application to Web Connector
Open the configuration file STRATAFOLIO.BrooklineCompanies.Fletcher.QWC you downloaded from the previous step.
The image below shows what this file looks like. In this example, we downloaded the file to the Downloads folder.

To open this file, you can either double-click on it or right-click on it and select the Open with QuickBooks Web Connector option.
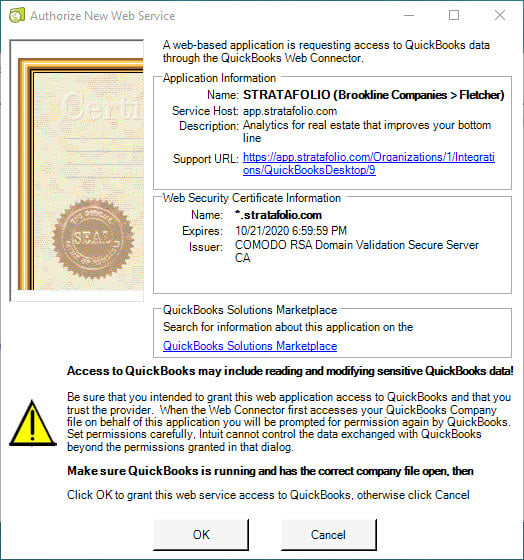
This file opens the Authorize New Web Service window, as shown below.
If you see this window, you are ready for Step 4. Click on the bottom right button labeled Next at the bottom of this page to proceed to step 4.
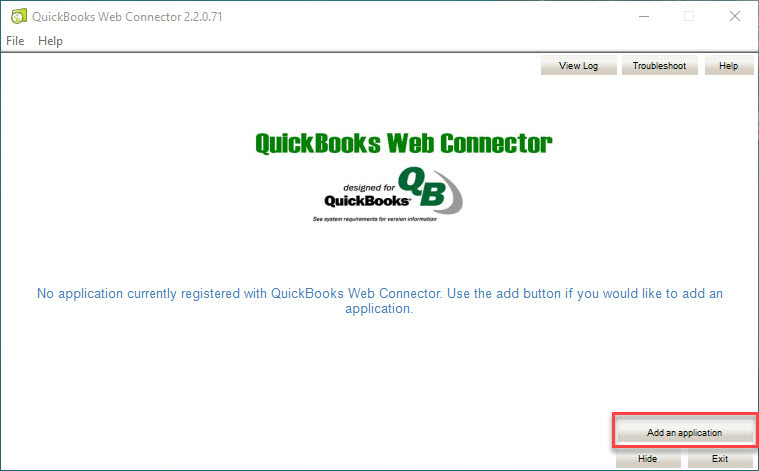
If you don’t see the Authorize New Web Service window, follow the steps below:
- Select Start and type Web Connector.
- Select the Web Connector application.
- Click Add an application.
- Locate the folder where you downloaded the
STRATAFOLIO.BrooklineCompanies.Fletcher.QWCfile. - Double-click on the file to open it. Or, click on the file and click the Open button.
This will open the Authorize New Web Service window.
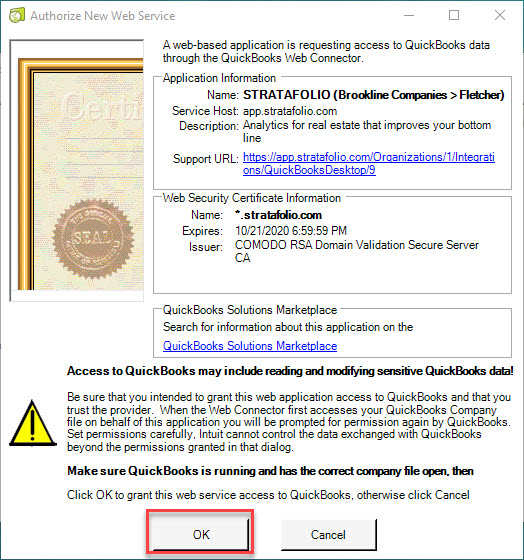
Authorize New Web Service
Review Application Information and Web Security Certificate Information, then click OK.
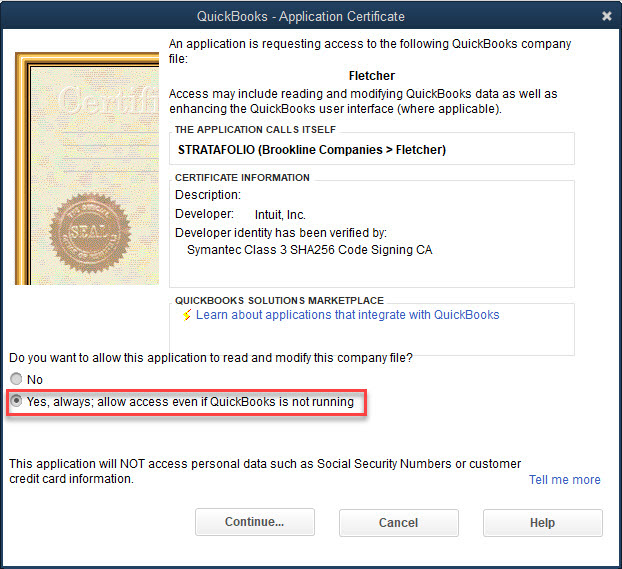
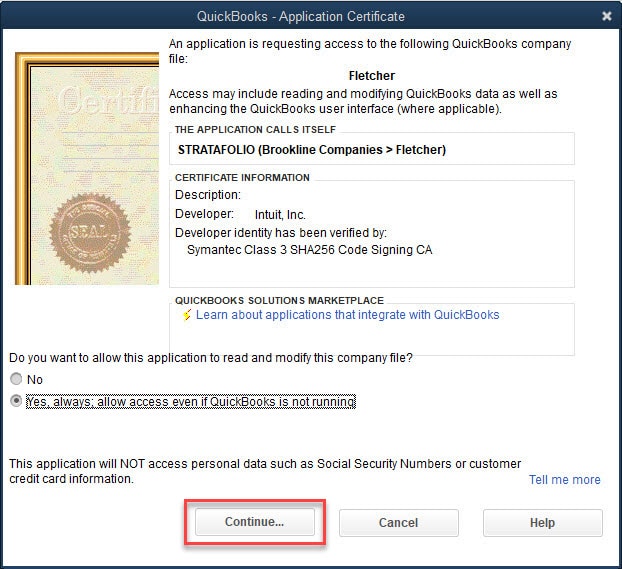
QuickBooks – Application Certificate
- Review the Certificate Information.
- Under “Do you want to allow this application to read this company file?”, select Yes, always; allow access even if QuickBooks is not running.
- Once you click Yes, always; allow access even if QuickBooks is not running, another window will open and ask: “Are you sure you want to give this app access to your data even when QuickBooks isn’t running?”, click Yes.

- Now click the Continue… button.
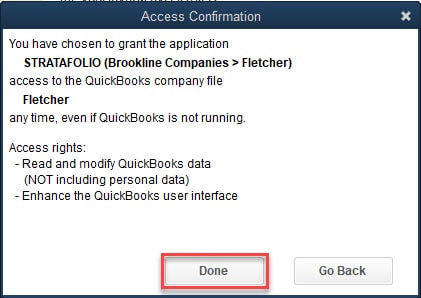
Access Confirmation
Review connection details, then click Done.
Web Connector Application Password
Click on the new Application’s Password field and enter a password. Depending on your Web Connector’s version, you may be prompted to save your password. Select Yes if you do.

NOTE: The password you enter will be ignored because the configuration file contains a secure link to this account.
Initial Update
Click the button labeled Select All or the checkbox next to the new Application, as shown below. Depending on your Web Connector’s version, you may be prompted to save your password. Select Yes, if you do.
If the checkbox is not selected, select it again. Then click the Update Selected button as shown below:
This initiates the synchronization process. Large company files may take a few minutes to complete.
How to Know if Your QuickBooks Desktop Synchronization was a Success
If synchronization was successful, the Status column will show Last result: Success!
Once you see this, then repeat the process one more time to send your initial data to STRATAFOLIO. The first connection is a handshake to verify the connection, and the 2nd connection will start uploading the data. This is only done during the first integration.
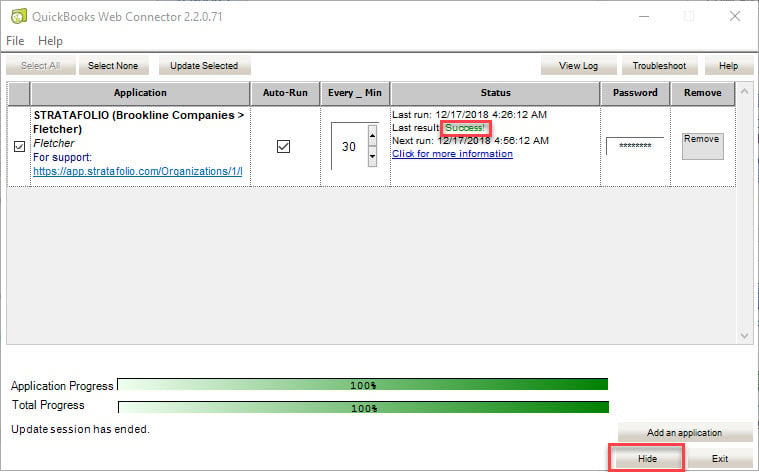
Once the second update shows Last result: Success! Instead of clicking Exit, click Hide. This will ensure your Web Connector connection continues synchronizing your QuickBooks data with STRATAFOLIO after the number of minutes specified in the Every_Minute field elapses.
You will also be able to see the latest synchronization statuses in the STRATAFOLIO’s Integrations tab in the Organization’s detail view.
If the synchronization was unsuccessful, please click the View Log button and submit a ticket to the STRATAFOLIO team with the contents of the log.

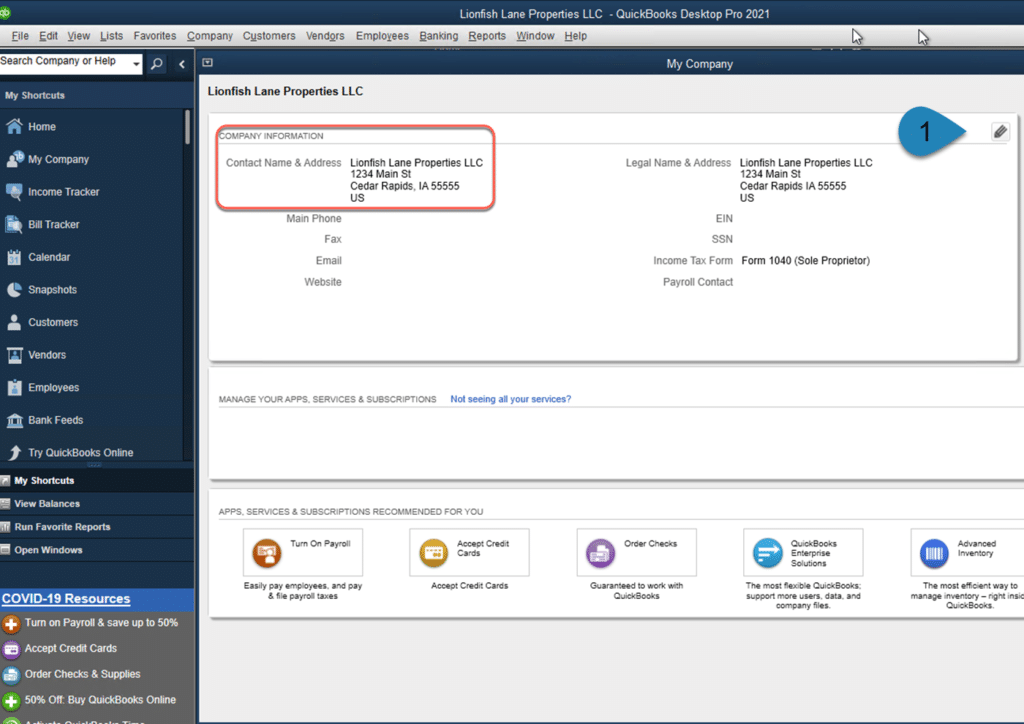
How to Change the Company Address Using QuickBooks Desktop
Updating Address in QuickBooks Desktop
In STRATAFOLIO, the invoicing address is determined by the value entered in the Company Information field. To make sure that your invoices are reflecting the correct address and remit to, you will need to verify that the information is correct and up to date.
To update the address for invoicing using QuickBooks Desktop, follow these easy steps:
Select the Company in the taskbar.
Select My Company.
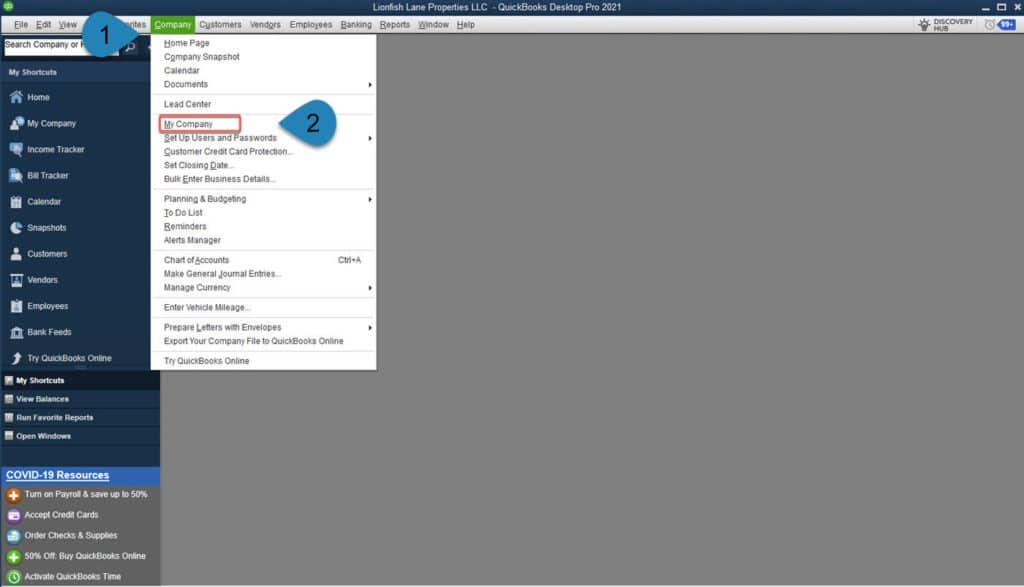
Select the Edit (pencil) icon at the upper right of the My Company page.
In the Company Information window, make any necessary changes.
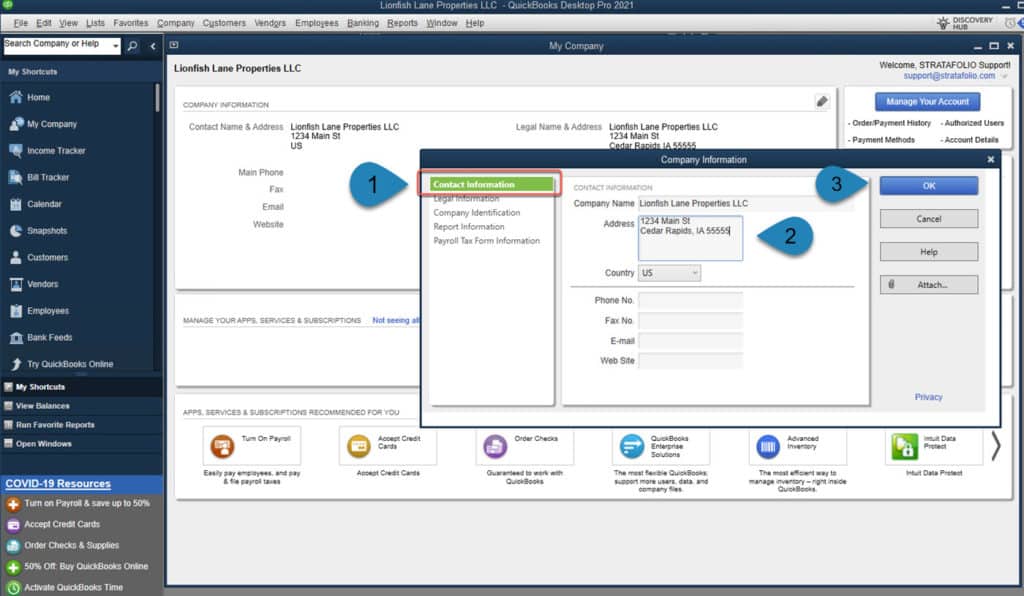
Choose OK.
It’s that easy! Once you do this, the changes will automatically reflect in your STRATAFOLIO account, so no need for double entry.
How Do I Export Customers from QuickBooks Desktop
Log in to QuickBooks Desktop
In QuickBooks Desktop, select the drop-down in the top menu labeled Customers, then choose Customer Center.
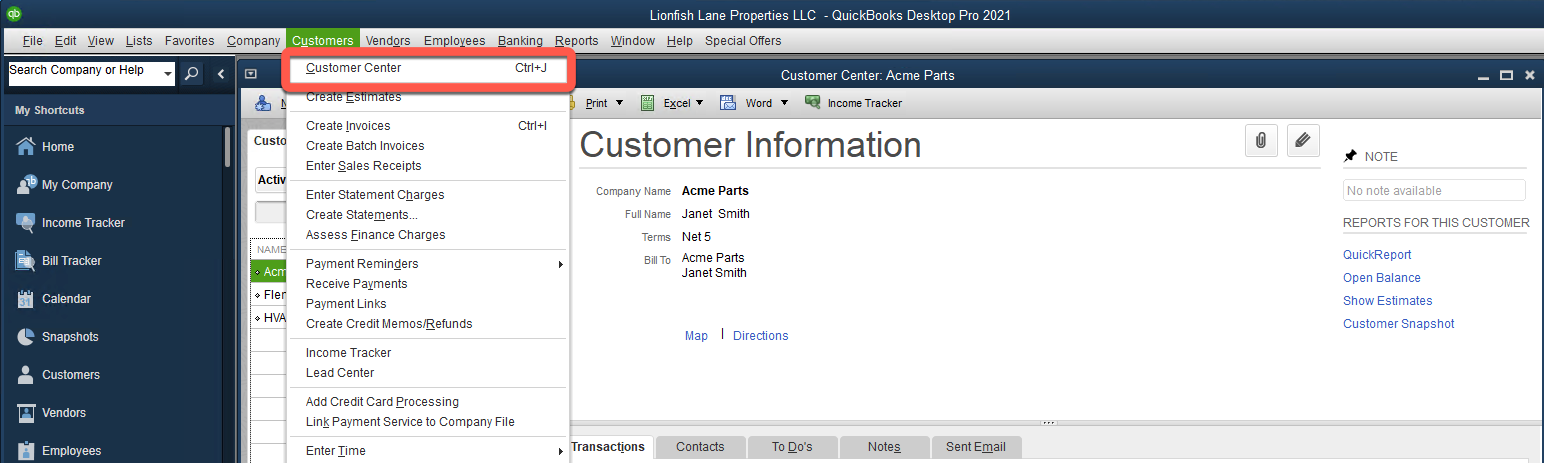
Select Excel and the Export Customer List.

The pop-up will show modifications that you can select. For this purpose, simply select Export.
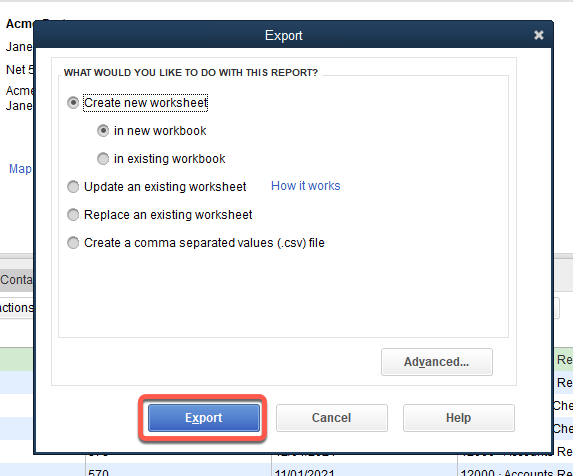
Once you have completed these steps, you will have an Excel document you can share that lists all the information you have for the customers/tenants set up in your QuickBooks Desktop account.
Update Web Connector for QuickBooks Desktop by Authorizing a New Computer
Integrations for QuickBooks Desktop
During the Onboarding Process, you should have integrated your QuickBooks Desktop account(s) with STRATAFOLIO. This happens with the help of Web Connector, a plug-in from Intuit QuickBooks, to enable the syncing process with third-party applications. There are a few instances when you may need to change your integration setup with STRATAFOLIO.
NOTE: If you have QuickBooks Online and need to reauthorize your QuickBooks, please follow the steps in the article QuickBooks Online Syncing Error Instructions.
Situations Needing to Update Web Connector
After the initial integration, you will normally only need to add a new link to the Web Connector when something changes. This saves a lot of time and effort in reconnecting your account. Some of these may include:
- You have purchased a new computer and need to have access to the Web Connector on the new computer
- You need additional access to Web Connector for another user (using the same QuickBooks Desktop file in a shared location)
- The QuickBooks Desktop files have moved to another location on your computer or server
- You switch Host providers for your QuickBooks Desktop account
Where to Start When Authorizing a New Computer
In your QuickBooks Desktop:
- Navigate to where you access QuickBooks Desktop
- Open the QuickBooks file that you need to authorize. Verify that it is in Single-User Mode
NOTE: If you are replacing a previously authorized computer, you should delete the old one so as not to cause issues at a later date
Log into STRATAFOLIO (preferably in Chrome) and opened in the same environment:
- Log in to your portfolio
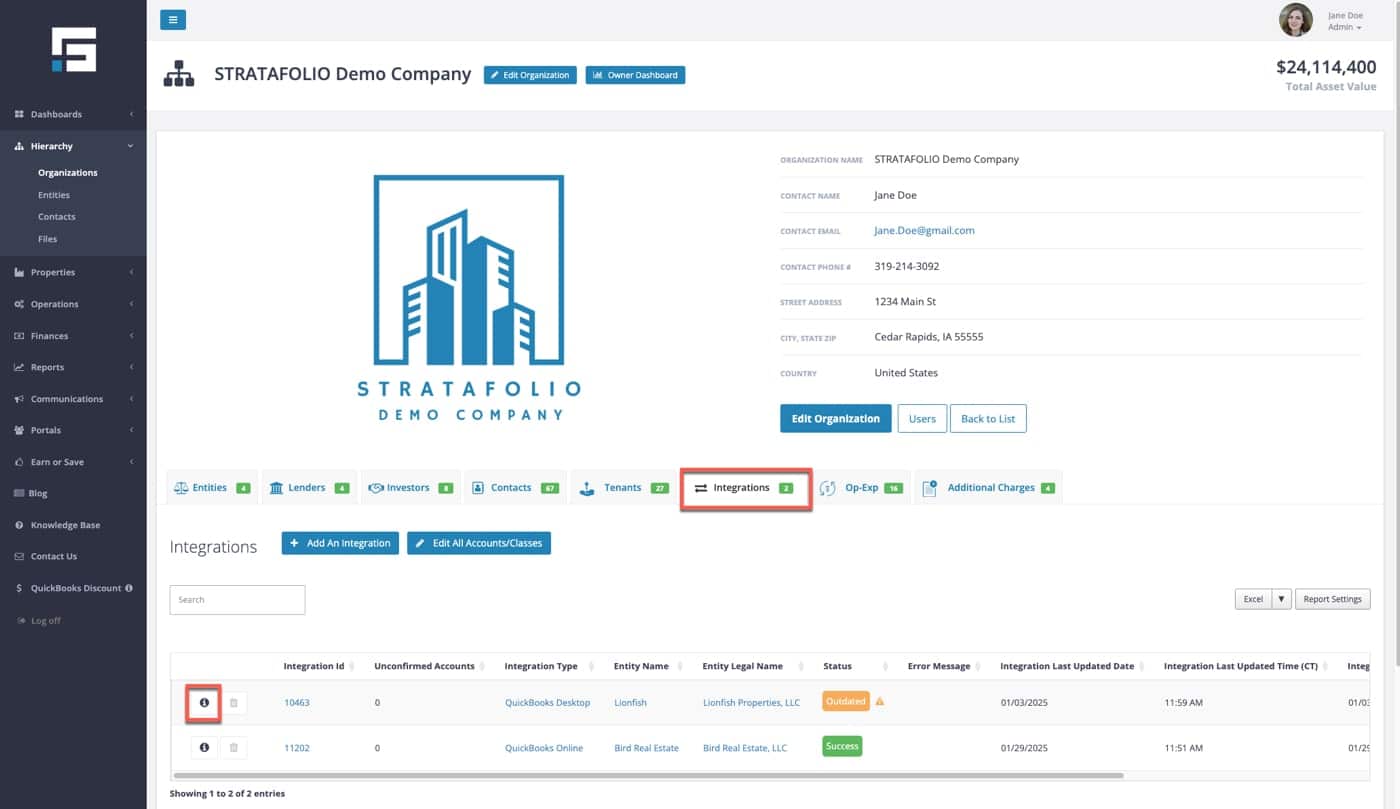
- Select the Integration tab on the main Organization view on the left-side navigation menu.
- Select the “i” on the left side of the integration line that corresponds to the same QuickBooks Desktop account that you have open
Integration with STRATAFOLIO
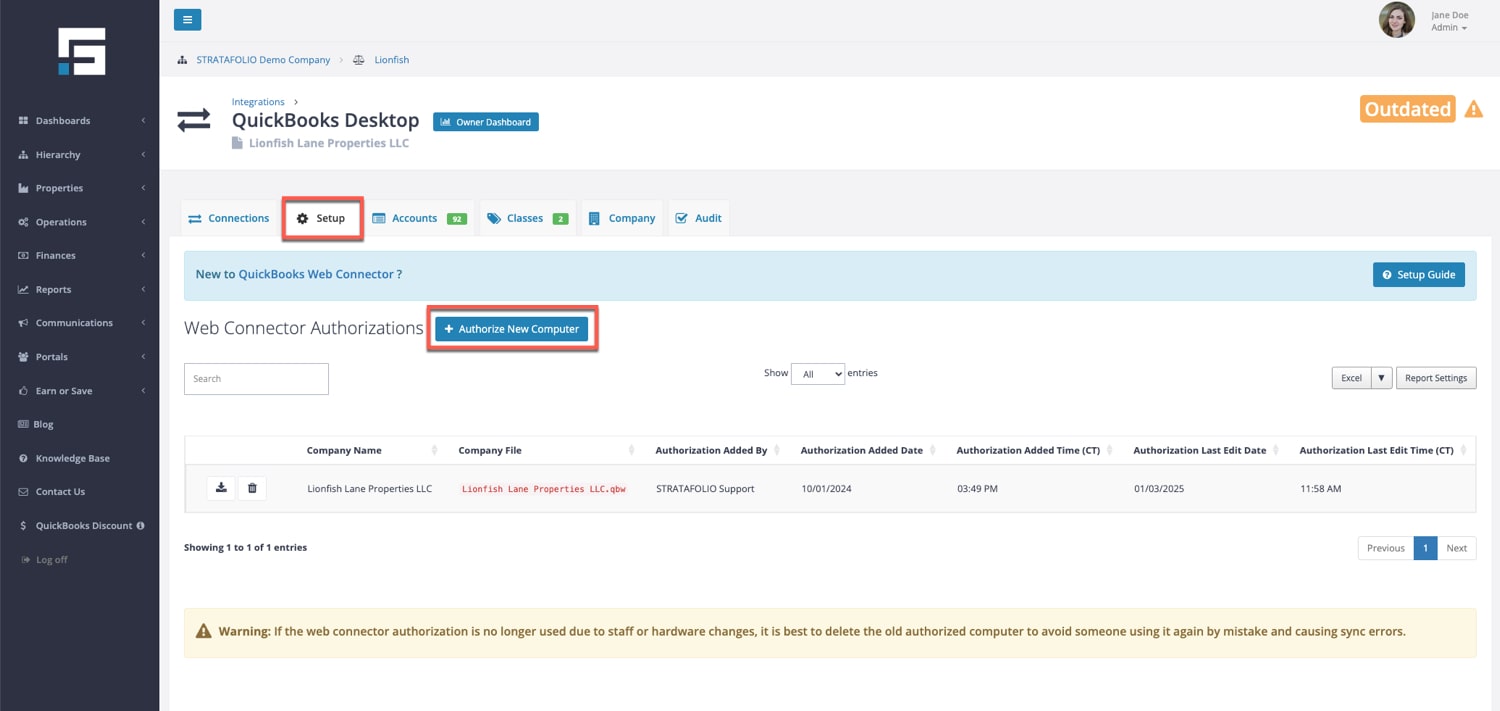
In the Integration, open the Setup tab
- This will show all of the authorized computers already set up for this integration
- Select Authorize New Computer
- A file will be downloaded for Web Connector
When setting up the Web Connector for any account, you must select the correct options on the certificates. If you do not, it may work only temporarily
- The important certification options to select:
- Always run even if QuickBooks is not running
- If you get a drop-down for user options, you need to select the Administrator
Find copies of the Certificates and the written directions under the Setup tab > Setup Guide: How to Add a New QuickBooks Desktop Integration to STRATAFOLIO.
NOTE: Use the directions at the link only if you need to create a new integration, not to connect to an existing one.
Syncing the Web Connector
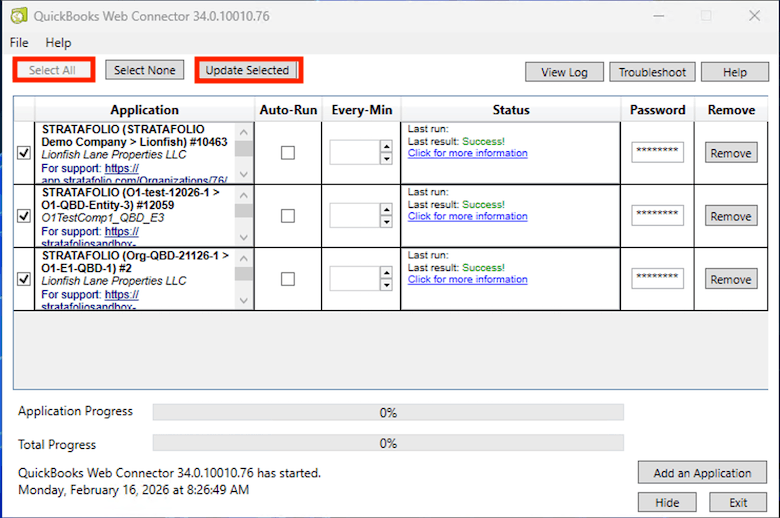
- You will see a list of all this Web Connector’s integrations
- Select only the Integration that you are working on in the check box in Web Connector. Choose “Select All” if updating multiple integrations.
- Select Update Selected
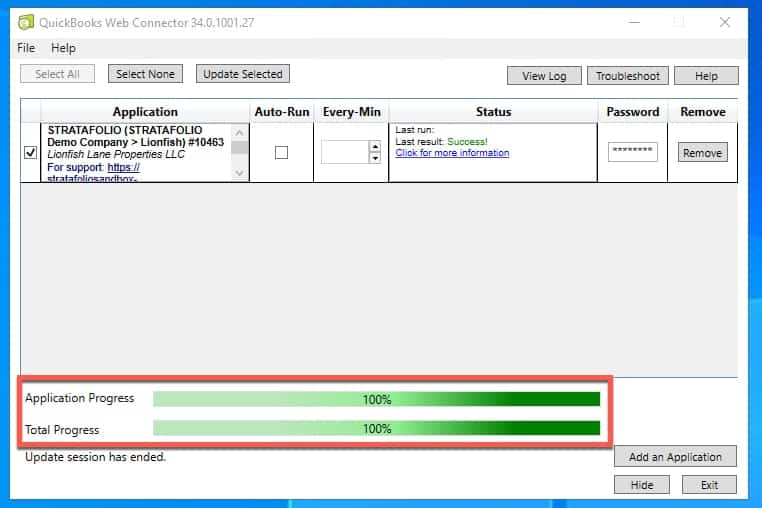
- Wait until 100% is reached on both progress bars in Web Connector
- Failure to wait until both bars are at 100% will result in a failure to sync, and the steps will need to be repeated from the beginning
- If a green Success does not appear, skip to Unsuccessful Integrations below
- If you receive a green Success message, go on to the next step
- Select Update Selected a second time
- Wait until 100% is reached on both progress bars in Web Connector to ensure that this integration is connected successfully
Unsuccessful Integration
If the sync is unsuccessful or an error occurs, please contact Intuit QuickBooks Desktop Support for further assistance. You can open View Log and copy/paste the entire document into a Word document. Then, using the Contact Us button on the left-hand navigation, fill out the Help Ticket and attach the document for possible assistance and troubleshooting.
More on Successful Integration of QuickBooks with STRATAFOLIO
You can close your QuickBooks and STRATAFOLIO if the integration has successfully synced.
If multiple integrations need to have an Authorized New Computer, follow the rest of the directions:
- Close this QuickBooks Desktop account and open the new one that needs to be updated/added
- Go back to the Integration tab in STRATAFOLIO and select the new Integration that needs to be updated
- Follow all of the steps above in order
NOTE: For this connection to work, you must have Administrator access in both STRATAFOLIO and your QuickBooks Desktop
Important: The Difference Between a New Integration vs. Authorizing a New Computer
In some situations, you may need a new integration with STRATAFOLIO. A new integration in STRATAFOLIO means remapping the chart of accounts, leases, loans, income items, and possibly much more. Consult the STRATAFOLIO Support Team before proceeding with a new integration to save yourself time and effort.