Your STRATAFOLIO account looks best when it reflects your brand and your properties. You can personalize your account in two ways. First, you can add your company logo at the Organization level. Second, you can add photos at the Entity level using Showcase Images. Adding these images makes your account easier to recognize and gives your team and tenants a more polished experience. In this article, you will learn where to add each type of image and how to upload them step by step.
Before You Begin
Keep a few things in mind before you upload your images.
- Your logo file must be 400 x 400 pixels or larger. If your logo is smaller than this, resize it before uploading. A square version of your logo works best.
- Photos should be saved in a standard image format. STRATAFOLIO supports common image types such as JPG, JPEG, PNG, GIF, and BMP. Files may be no larger than 30 MB.
- You will need access to your Organization and Entity details in STRATAFOLIO. If you cannot see these pages, contact your account administrator about your access role.
Where to Find This Feature
Both image options live in Hierarchy from the left side navigation menu.
Your logo is added from the Organization Details page. Navigate to Hierarchy, then Organizations, and select the i icon next to your organization to open its details.
Your photos are added from the Entity Details page. Navigate to Hierarchy, then Entities, and select the i icon next to the entity you want to update. Photos are uploaded on the Files tab.
How to Use This Feature
How to Add Your Organization Logo
Follow these steps to add or update your logo.
- From the left side navigation menu, go to Hierarchy, then select Organizations.
- Select the i icon next to your organization. This opens the Organization Details page.
- Select Update Organization Logo.
- Choose your logo file from your computer. Remember, the image must be 400 x 400 pixels or larger.
- Save your changes. Your logo now appears for your organization.
How to Add a Photo Using a Showcase Image
Follow these steps to add a photo to an entity.
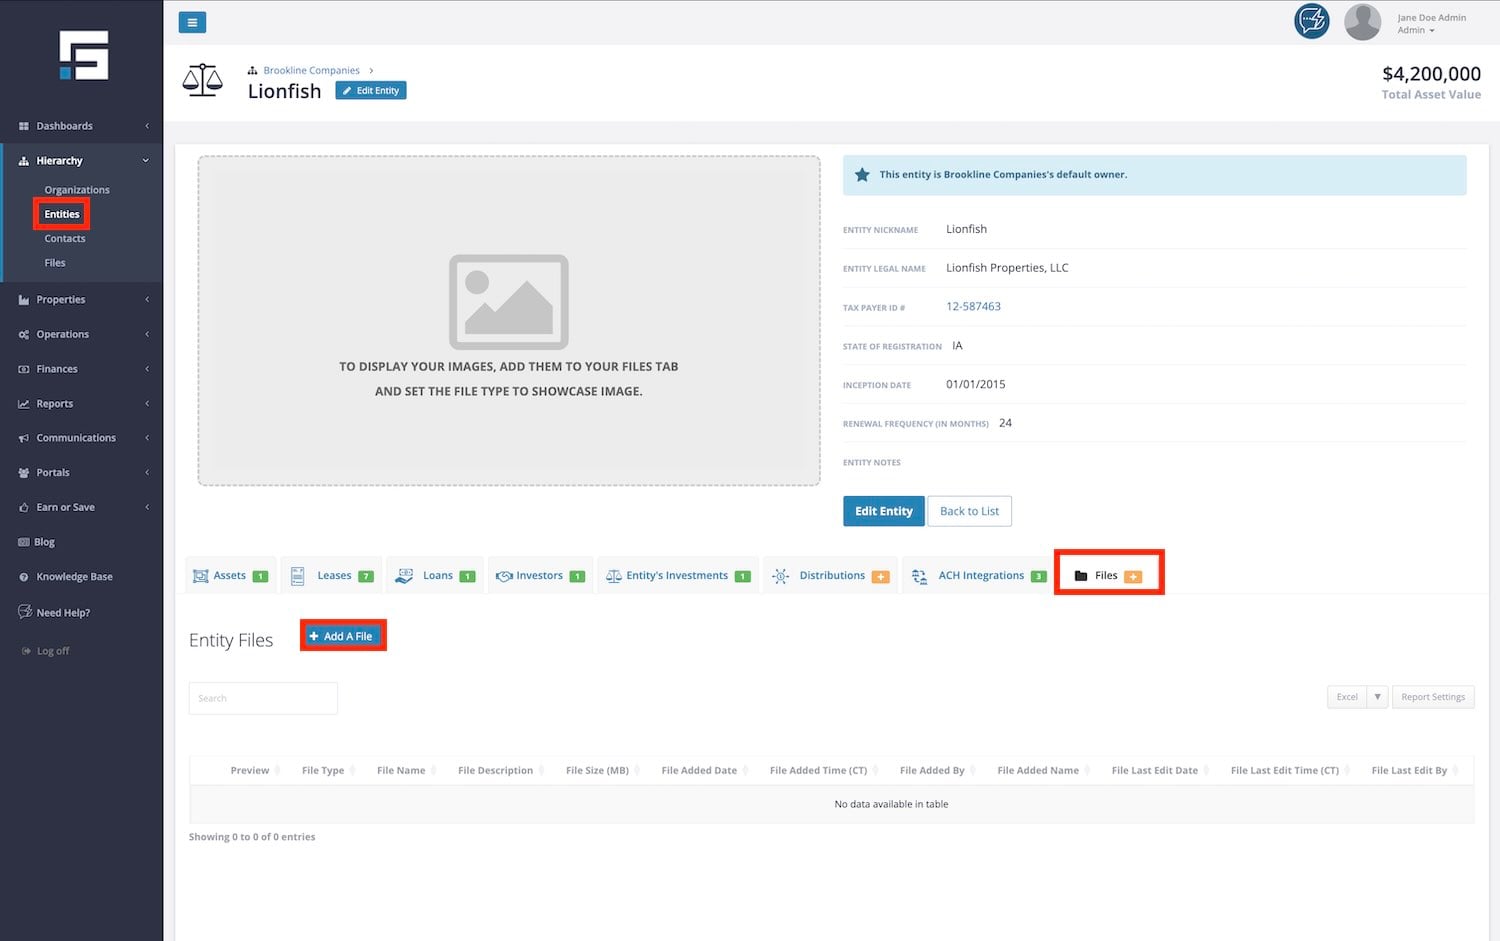
- From the left side navigation menu, go to Hierarchy, then select Entities.
- Select the i icon next to the entity you want to update. This opens the Entity Details page.
- Select the Files tab.
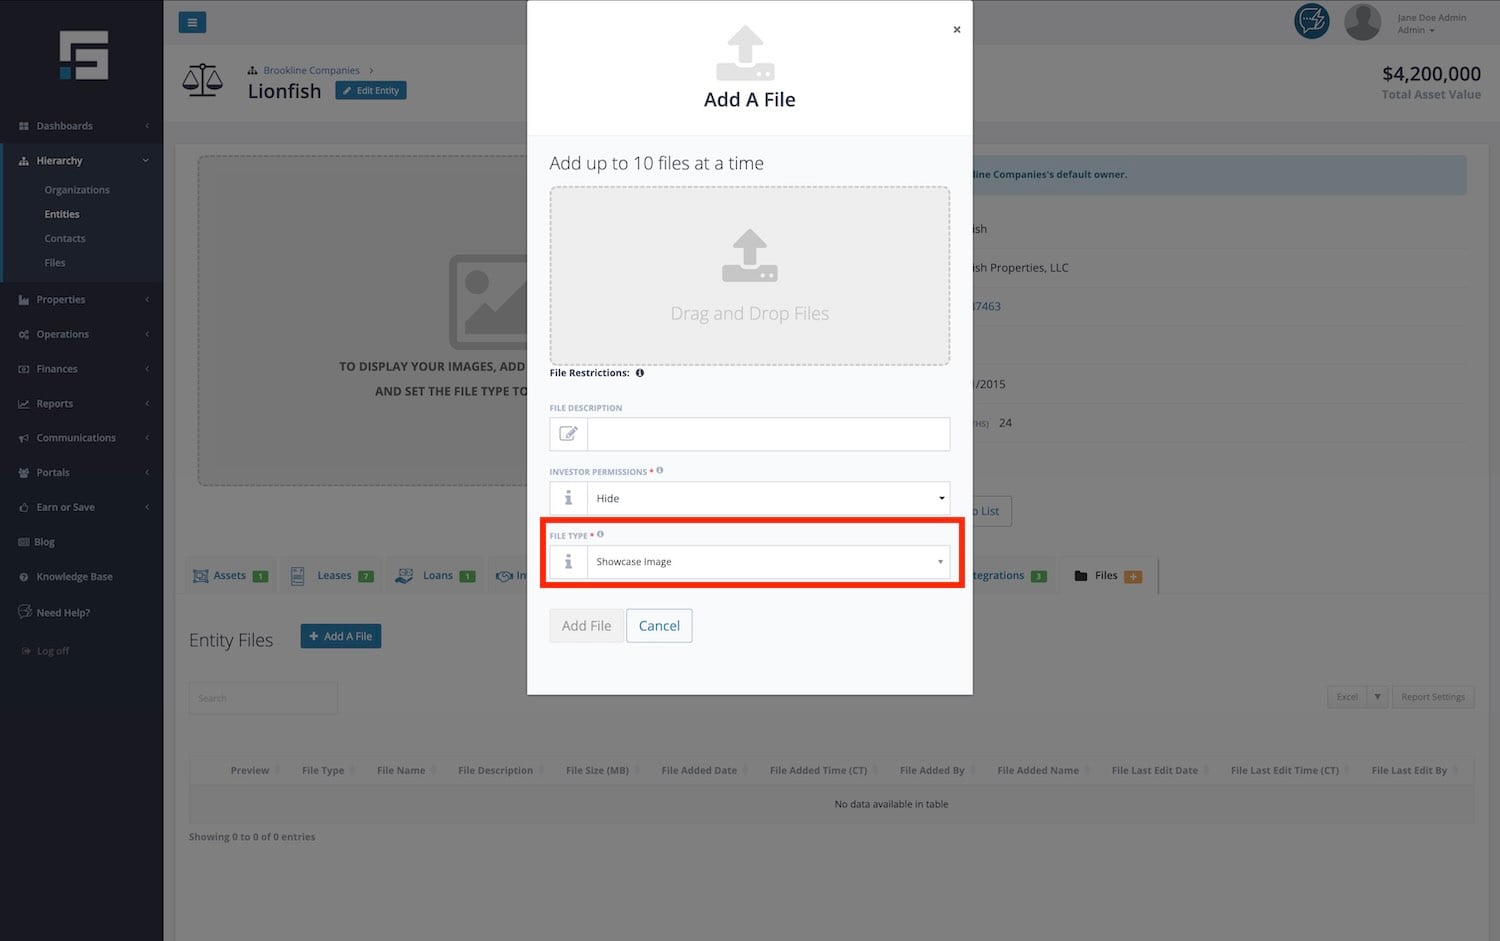
- Upload your photo. You can browse for the file on your computer or drag and drop it into the upload window.
- In the File Type dropdown, select Showcase Image.
- Select the Add File button to finish. Your photo is now saved to the entity.