Do you need to create and submit 1099s? Commercial real estate companies often have dozens of contractors perform work on their properties throughout the year. This means that you want to be sure you are including all contractors that need 1099s. Here is how you can map your 1099 accounts in QuickBooks Online.
Why Should I Map 1099s?
Mapping 1099 accounts gives you a snapshot of which vendors will need 1099s issued at year-end. If you notice that any contractors are missing, you can easily add them through the vendor portal. Here is the general process:
Step #1: Select “Vendors” Under “Expenses”
On the left-hand navigation menu, select “Expenses.” Then, select “Vendors.” This will bring you to the ledger of all your vendors.
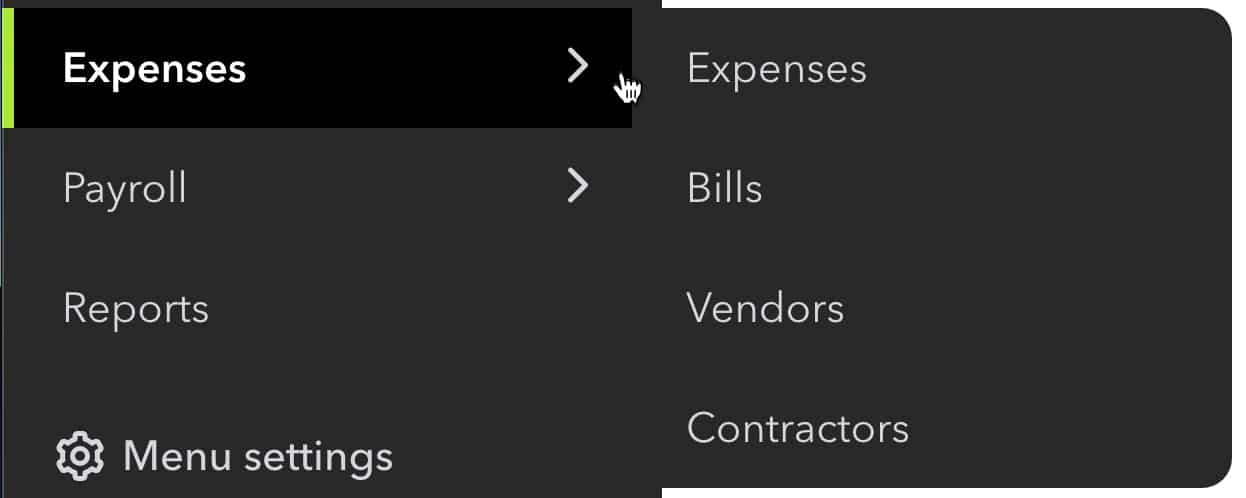
Step #2: Search for Contractors or Add New
On the top of the screen, there are a few different tabs. The “Vendor” tab outlines all of your vendors, including those who do not get a 1099. The next tab, “Contractors,” is where you will find a list of all vendors currently set up to receive a 1099.

You can either search for a specific contractor that you need to map for a 1099 or you can set up a new contractor. Only set up a new contractor if the vendor is not already on your ledger. Once you have verified that the vendor is not already set up, select “New Vendor” in the right-hand corner.
Step #3: Add Vendor Details
Next, you will enter all of the applicable information of the vendor, including the legal business name, phone number, email, and address. If the vendor is a 1099 vendor, you should add a copy of the W-9. The more information you can enter, the better.
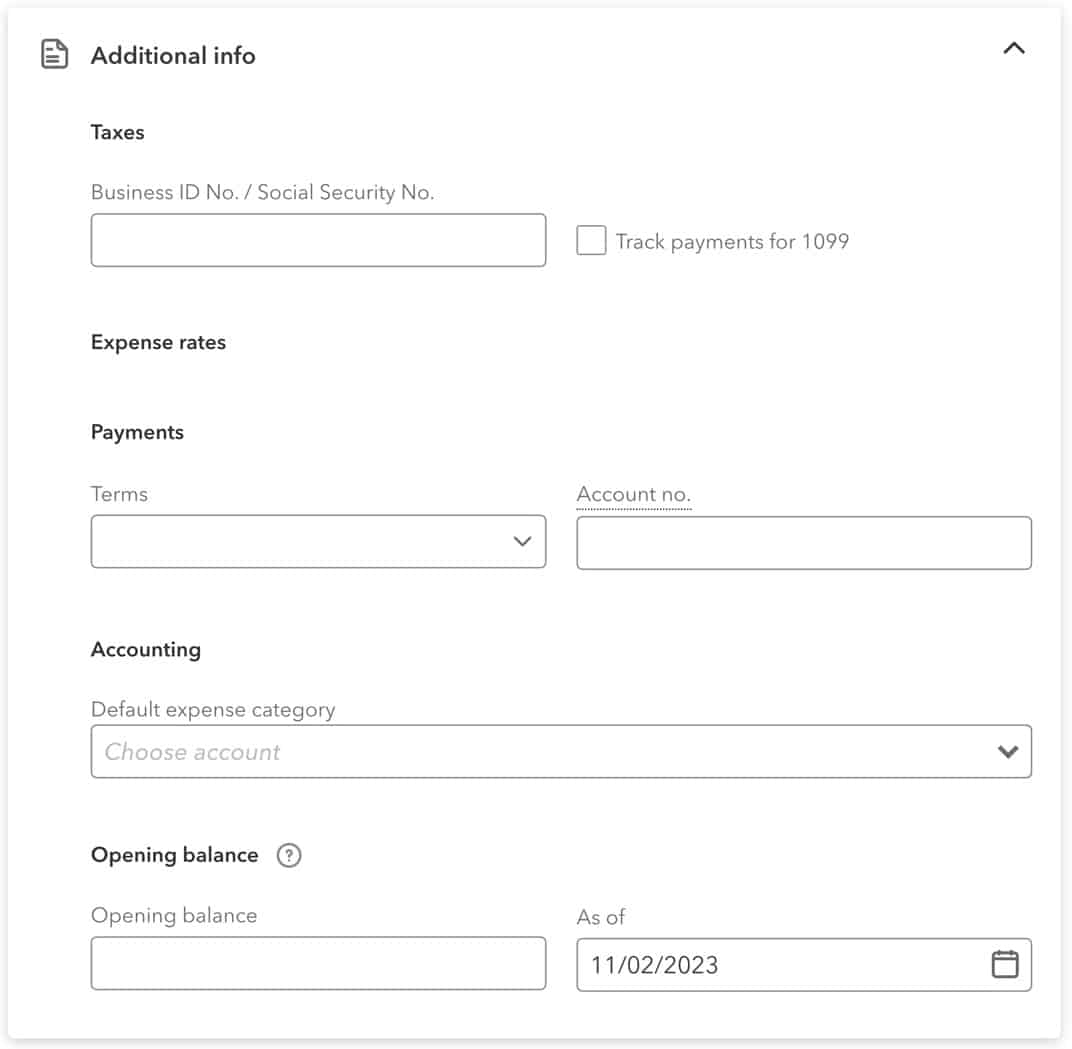
At the bottom of the vendor setup screen, there will be a section called “Additional Info.” Here you will check the “Track Payments for 1099” box if the vendor needs to be issued 1099 at year-end. You will also need to enter the business ID or Social Security Number of the vendor. This is where obtaining a W-9 is beneficial as all of the information needed for this form will be found on a W-9 from the vendor.
Step #4: Select “Save”
Once you’ve entered all the necessary information, click “Save” in the bottom right-hand corner. If you ever need to make changes to your vendor, such as removing them from the 1099 list or updating an address, you can do so by searching for the vendor and clicking on their profile.
How Can You Run a Preliminary 1099 Report?
Once year-end rolls around, you need to verify that all vendors are properly being issued 1099s and for the right amount. This can be done by running a 1099 report using the following steps:
Step #1: Select “Reports”
On the left-hand navigation, click on the “Reports” menu.
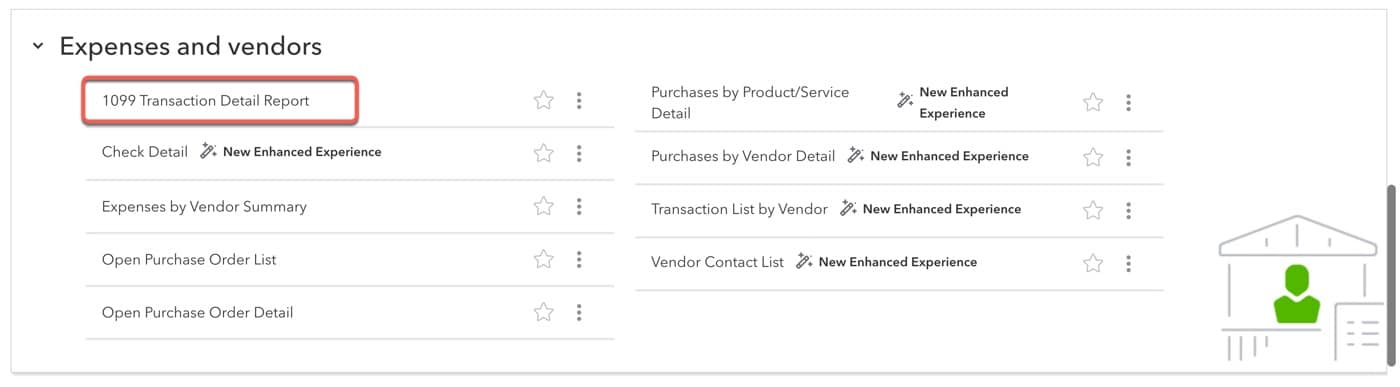
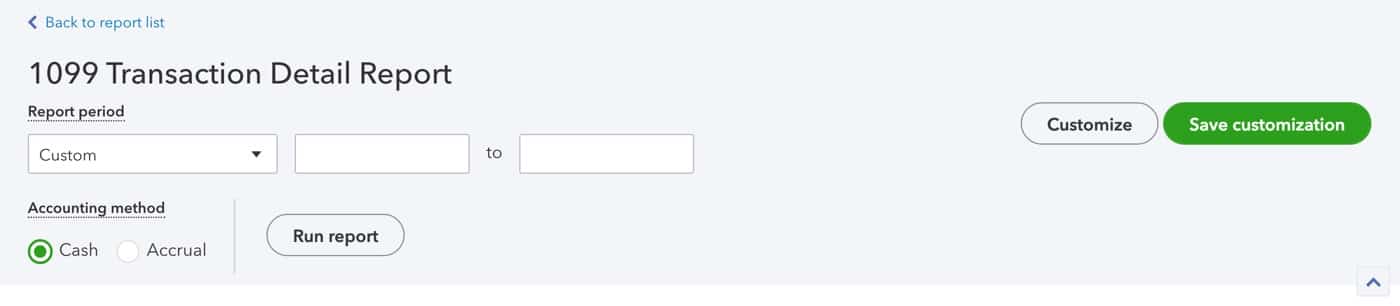
Step #2: Select “1099 Transaction Detail Report”
Scroll down until you find the “Expenses and Vendors” section of reports. Then, select “1099 Transaction Detail Report.”
Step #3: Adjust Search Criteria
Now, you will want to adjust your search criteria to fit the right date range, which is usually year-to-date. You also want to be aware of which accounting method you are using. If you are a cash-based taxpayer, you will want to be sure that the cash method instead of accrual is selected for the accounting period.
This report will break down all the 1099 information by vendor, including a detailed list of payments made throughout the year. If payments or vendors are missing, check out your vendor portal to adjust the mapping as needed. Reviewing your 1099 listing throughout the year can help you make the January 31st filing deadline of the 1099s much easier.
Why is it Important to Map 1099 Accounts in QuickBooks Online?
Mapping 1099 accounts in QuickBooks is important for numerous reasons. First, neglecting to issue 1099s to independent contractors can land you in trouble with the IRS. Obtaining a W-9 for all vendors can help you determine if a 1099 should be issued.
Additionally, try and map 1099 accounts when you set up the vendor in your system. Commercial real estate businesses can have hundreds of vendors, making it difficult to go back and determine who should be paid a 1099. Taking the extra time in the setup phase can save you hours of work down the road.
Summary
Do you still have questions on how to map 1099 vendors in QuickBooks Online? If so, reach out to one of our team members at STRATAFOLIO today. Our commercial real estate software integrates with QuickBooks Online, creating a seamless experience and helping you guarantee that all vendors are issued the proper year-end forms.
For more QuickBooks articles, check out all our QuickBooks Articles related content.