STRATAFOLIO gives you two ways to pay your rent through the Tenant Portal. Autopay withdraws your payment automatically each month. A one-time payment lets you decide exactly when to pay and exactly how much to send.
A one-time payment is useful any time you do not want an automatic withdrawal to handle things for you. You may want to pay early, catch up on a past-due invoice, or pay only part of a balance now and the rest later. You control the date, the bank account, the invoice, and the dollar amount.
This article walks you through the whole process, explains what every field on the payment screen means, and shows you how to make a partial payment when you cannot pay the full balance at once.
Before You Begin With Making A One-Time or Partial Payment
Make sure the following are in place before you start. Each one is required for the payment screen to work.
- You have accepted your Tenant Portal invitation and can log in. Invitations expire 24 hours after your landlord sends them. If yours expired, ask your landlord to send a new one.
- You have completed ACH Payment Setup and added a verified bank account. If you have not done this yet, follow the article Set up ACH Payments as a Tenant in STRATAFOLIO first. Without a verified account, the Bank Account dropdown will be empty, and you cannot continue.
- Your landlord has generated the invoice you want to pay. You cannot pay a charge that has not been invoiced yet. If you expect an invoice and do not see it, contact your landlord or property manager.
- You know whether fees apply. STRATAFOLIO shows a reminder on the payment screen that fees may apply to ACH payments. Your landlord decides who pays them, so ask your property manager if you are unsure.
Where to Find This Feature
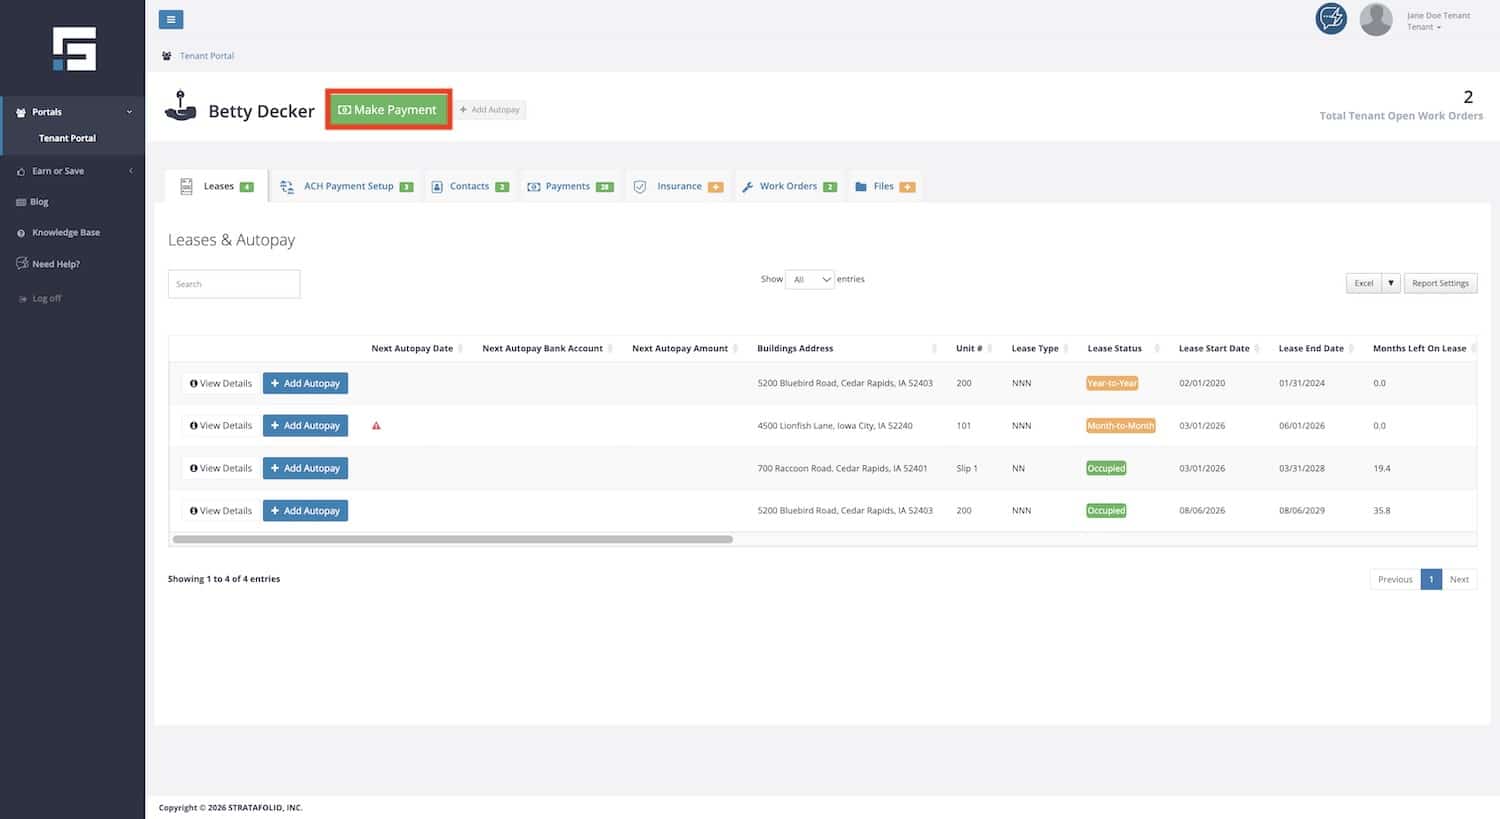
- Log in to the Tenant Portal.
- Select the Make Payment button.
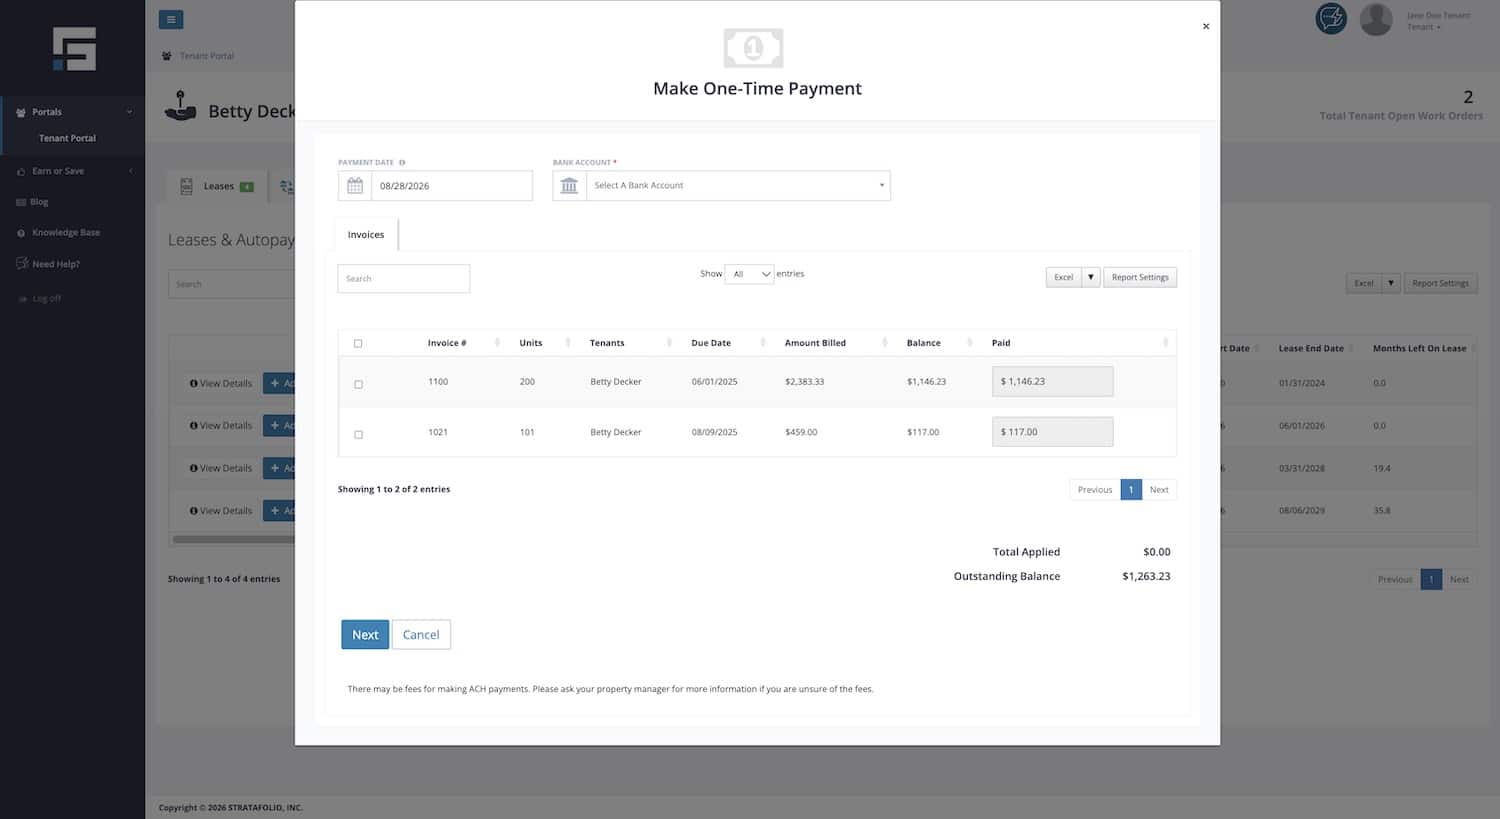
The Make One-Time Payment window opens on top of your current page. You do not leave the page you were on, and you can close the window at any time with the X in the upper corner.
How to Use This Feature
Step 1: Open the Payment Window
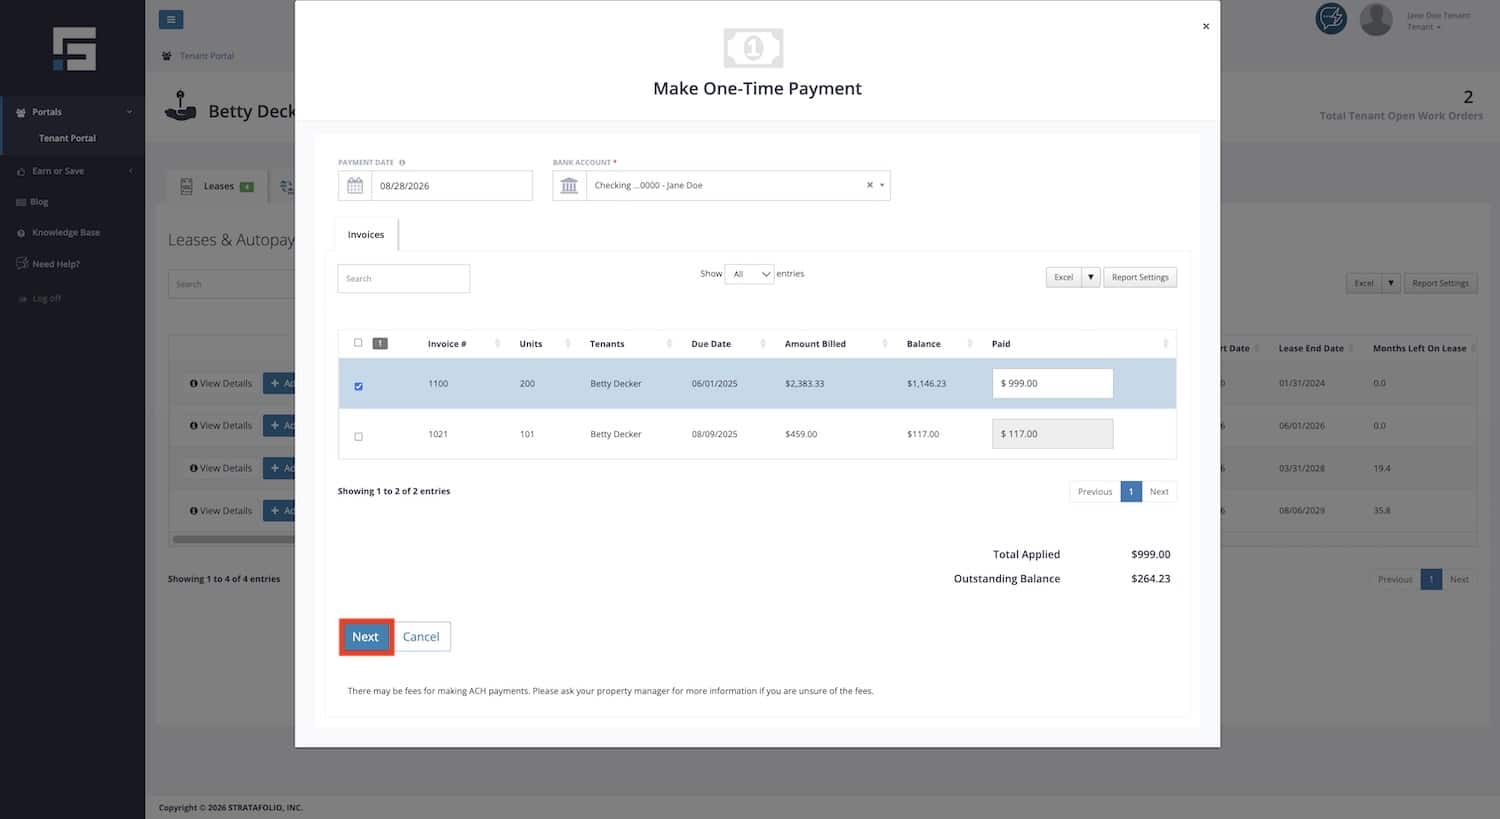
Near the top of your screen, select Make Payment. The Make One-Time Payment pop-up opens with the Invoices already showing.
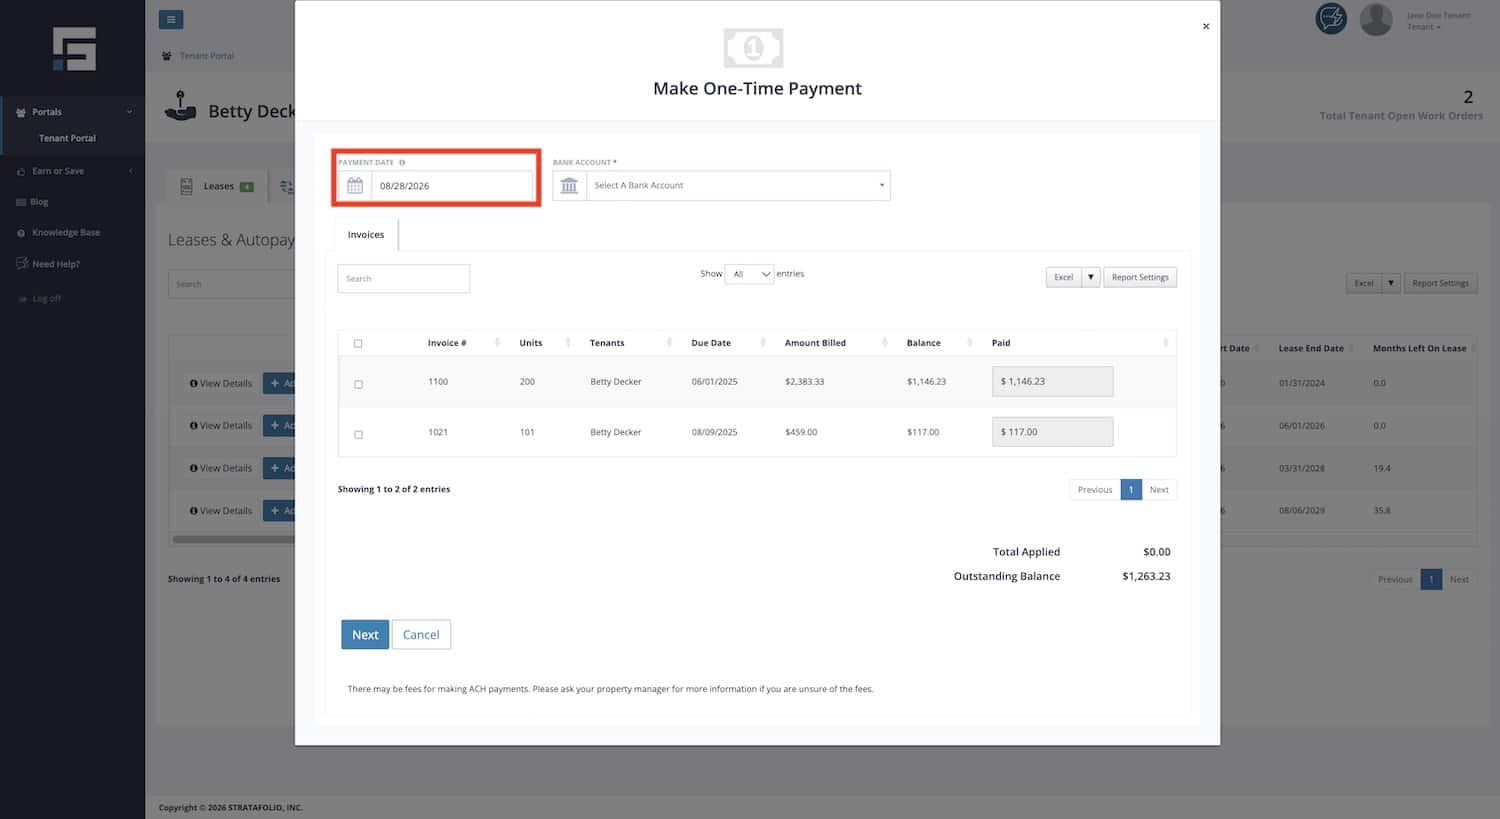
Step 2: Check the Payment Date
The Payment Date field fills in with today’s date. Leave it as is to pay now, or select the calendar icon and choose a different date. Hover over the information icon beside the field label for a reminder of how the date is used.
Step 3: Select Your Bank Account
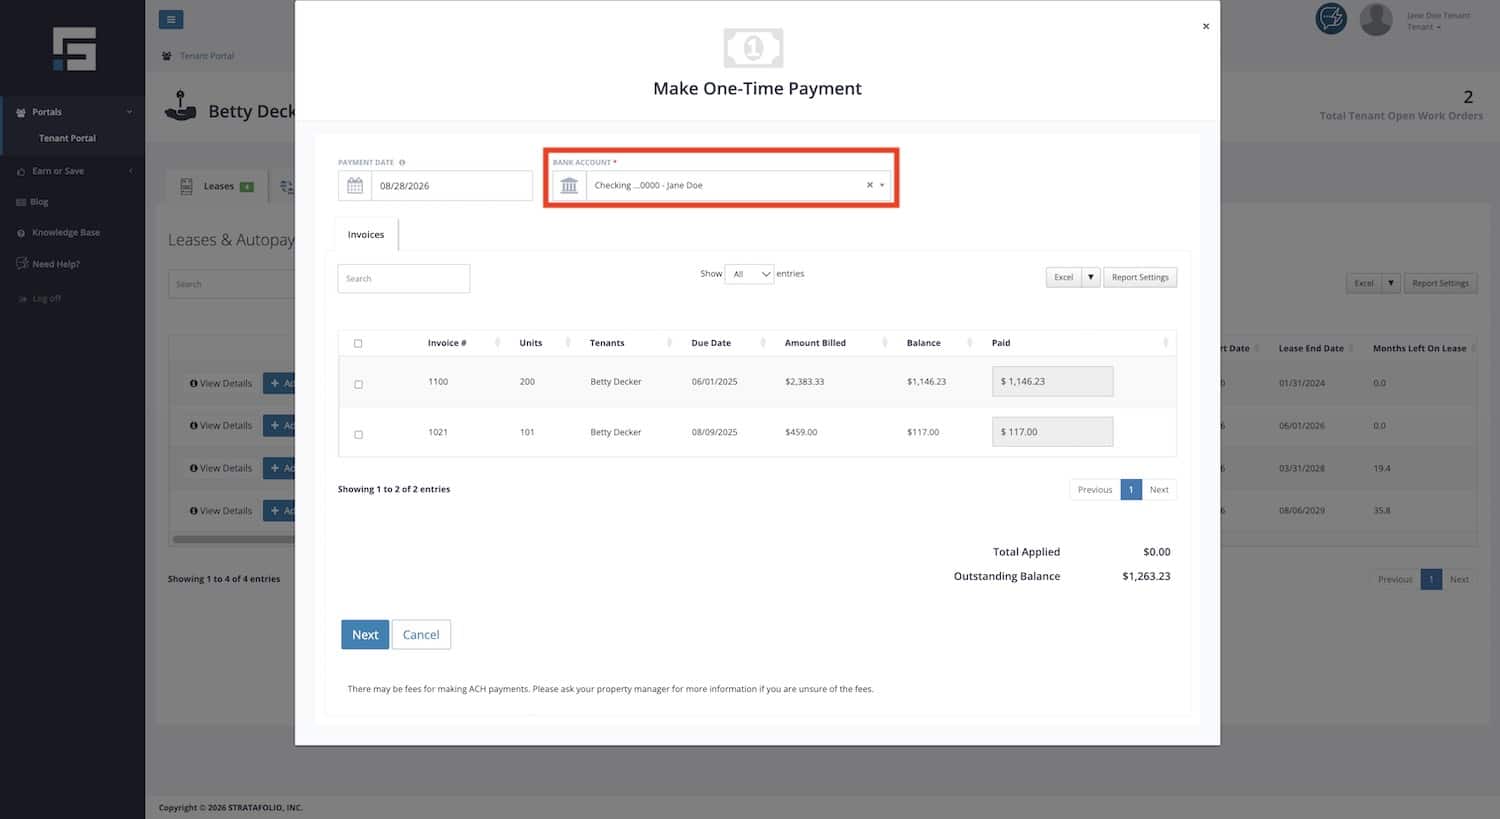
Bank Account is required and is marked with a red asterisk. Select the dropdown, which reads Select A Bank Account until you choose. Pick the account you want the money withdrawn from. Each account displays its type, the last digits of the account number, and the name on the account, for example Savings …0000 – Jane Doe.
If nothing appears in the dropdown, you have not finished adding and verifying a bank account yet.
Step 4: Select the Invoice You Want to Pay
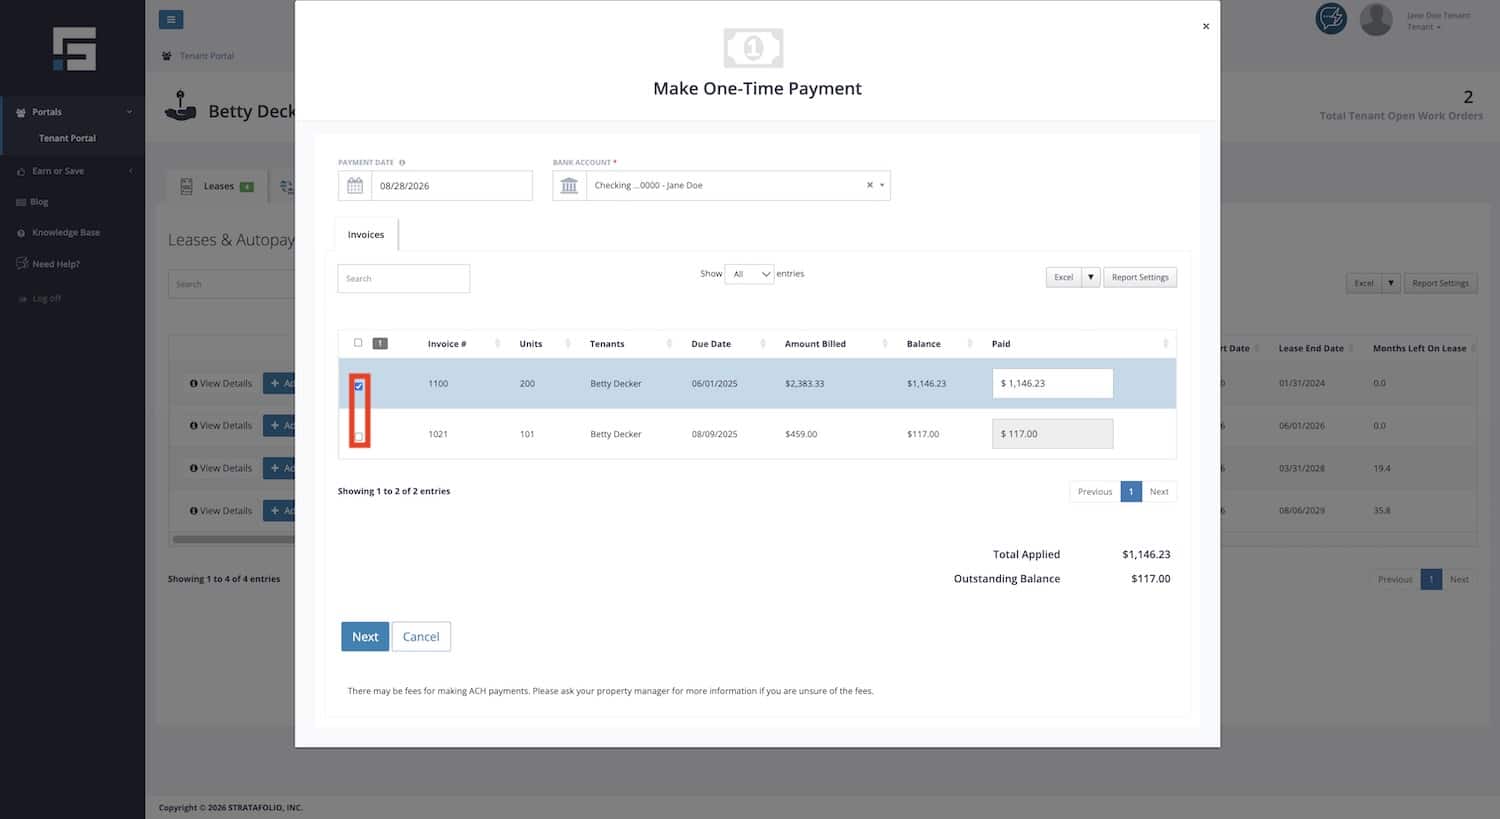
The pop-up lists every open invoice on your lease. Each row shows the Invoice #, Units, Tenants, Due Date, Amount Billed, Balance, and Paid.
Select the checkbox at the left of the invoice you want to pay. The row highlights, and the Paid column turns into an editable amount box.
If you have several open invoices, use the Search box to find one quickly, or change the Show entries dropdown to display more rows at once.
Step 5: Enter the Amount You Want to Pay
When you select an invoice, the Paid box fills in with the full remaining balance.
To pay in full, leave the amount alone.
To make a partial payment, click into the Paid box and type the smaller amount you want to send. For example, if your balance is $117.00 and you can only send $60.00 today, replace the amount with 60.00.
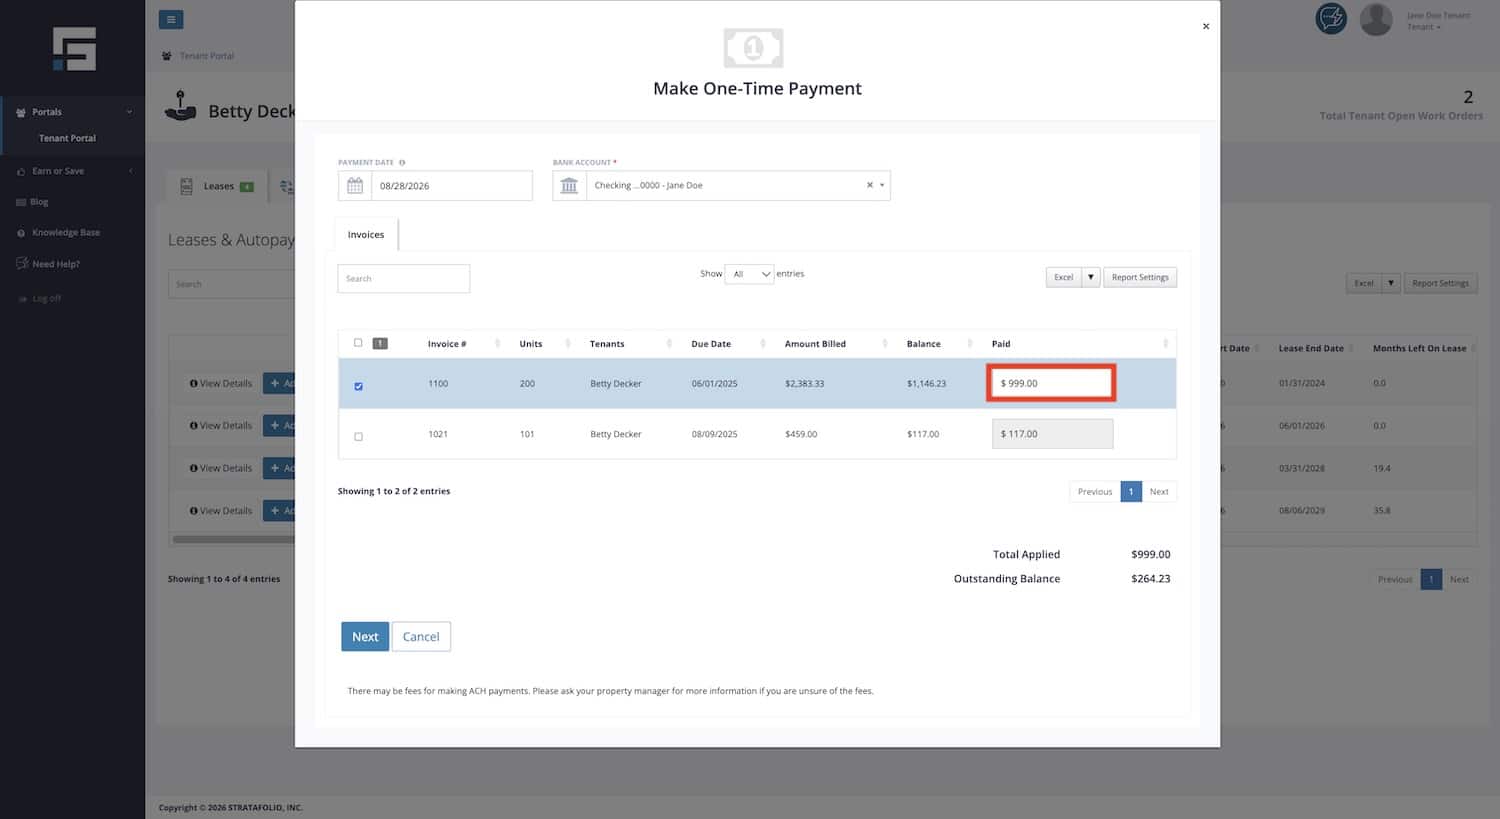
Watch the two totals below the table as you type:
Total Applied adds up everything you entered in the Paid column.
Outstanding Balance shows what will still be owed on the invoices you selected after this payment is applied.
If Outstanding Balance is greater than zero, you are making a partial payment and the remainder stays open on your account.
Step 6: Select Next
Select Next to move to the confirmation screen. Select Cancel instead if you want to close the window without paying.
Step 7: Verify Everything
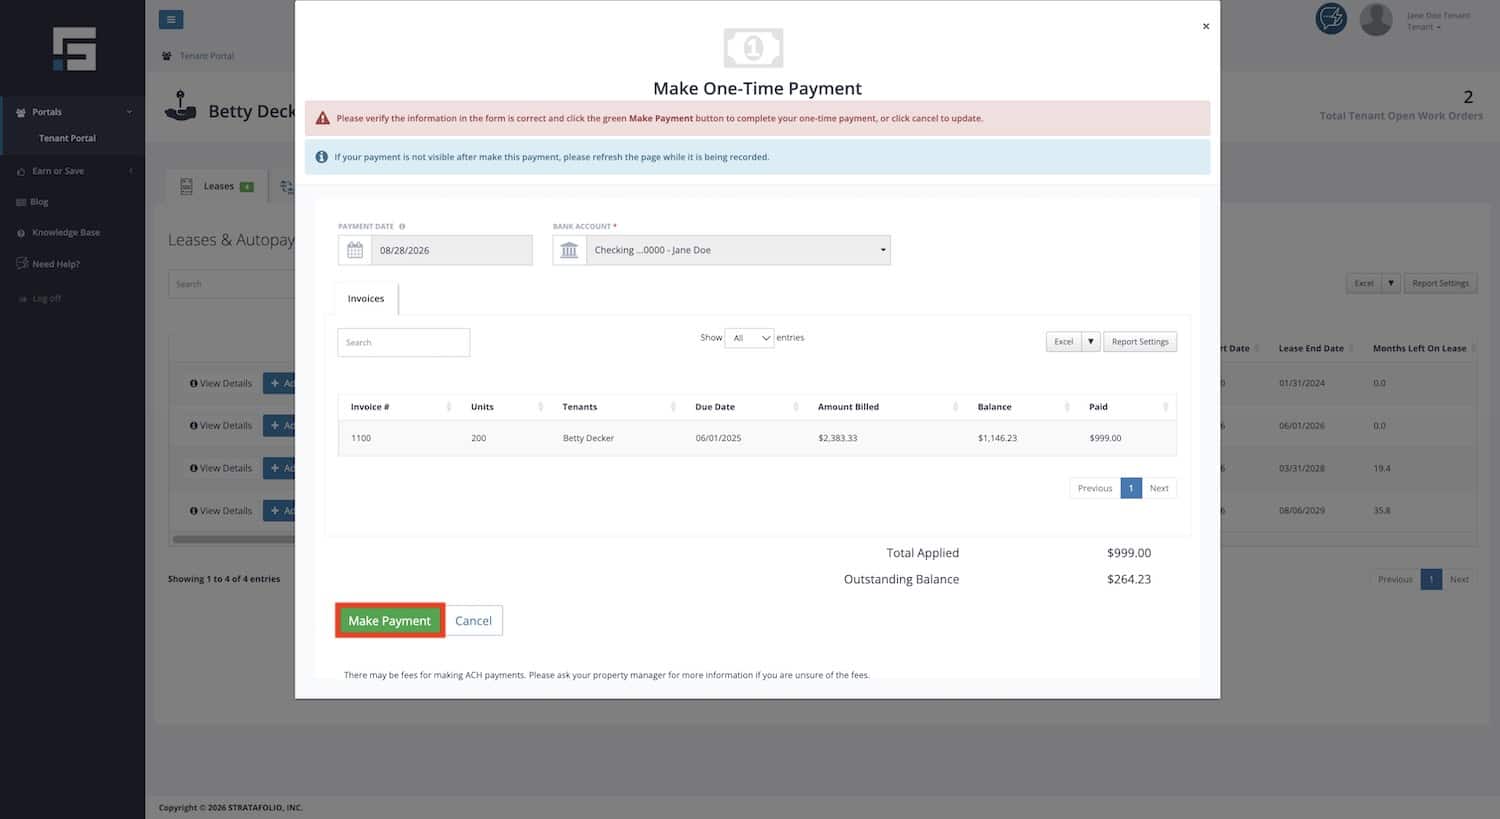
The confirmation screen shows your payment date, bank account, the invoice, and the amount, along with a reminder to check that the information is correct.
Read each line carefully. The invoice table on this screen is read-only, so if something is wrong, select Cancel and start again with the correct details.
Step 8: Select Make Payment
When everything looks right, select the green Make Payment button. Your payment is submitted for processing.