With STRATAFOLIO, tenants can request work orders, also known as maintenance requests or service reports, which will help users keep track of repairs. All subscription holders enjoy the following benefits:
- A single location will be available to track all the incoming work from tenants.
- Tenants can see progress as the issues are addressed.
- A notification to address the issue is sent to the designated source.
- Owners will have access to a historical record of all repairs requested from tenants.
Adding a Work Order
Begin on the left-hand navigation panel. Click on Tenant Portal, and then select the Work Orders tab.
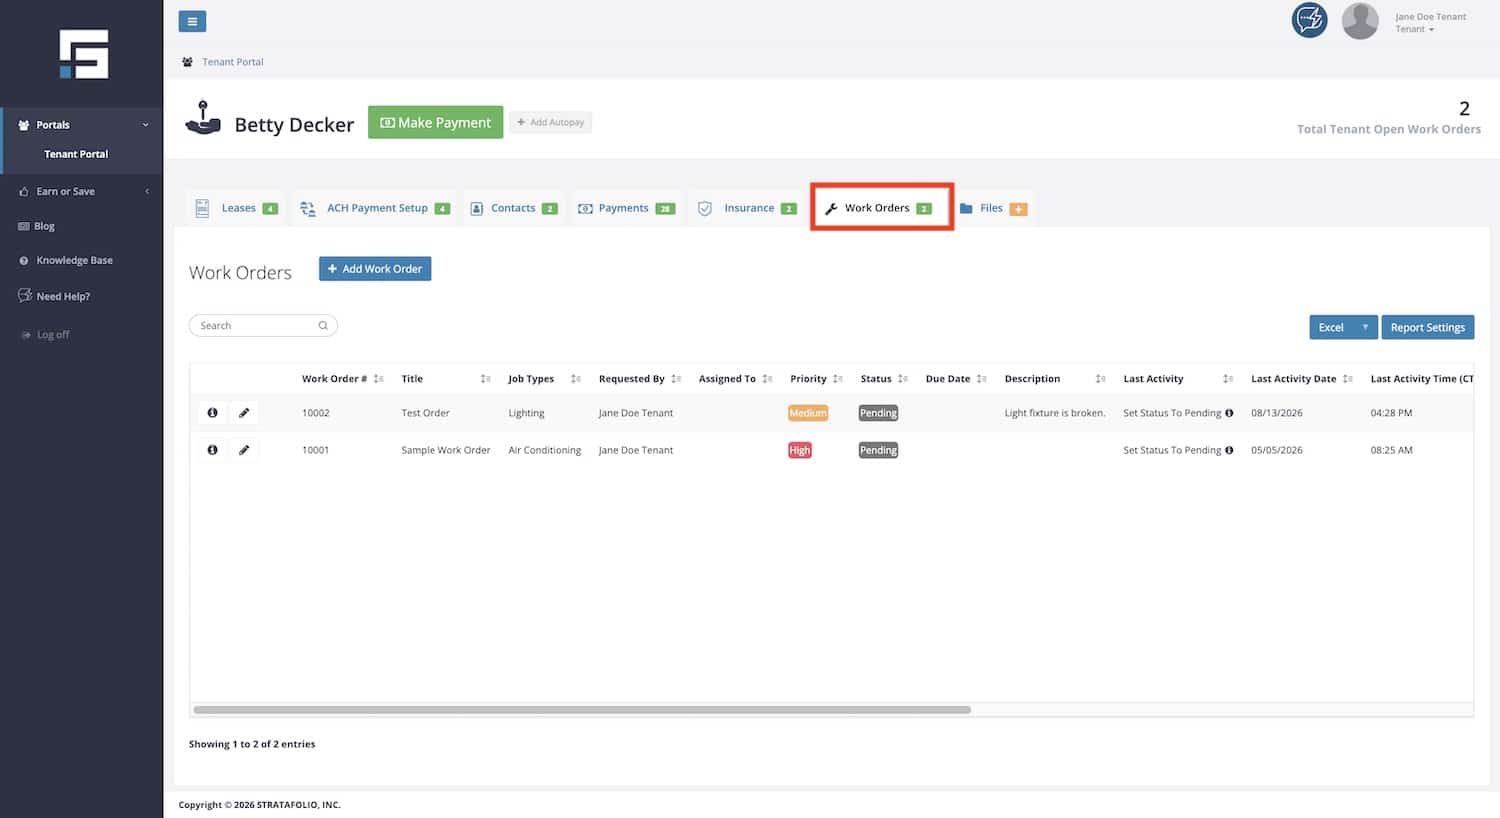
Create Work Order
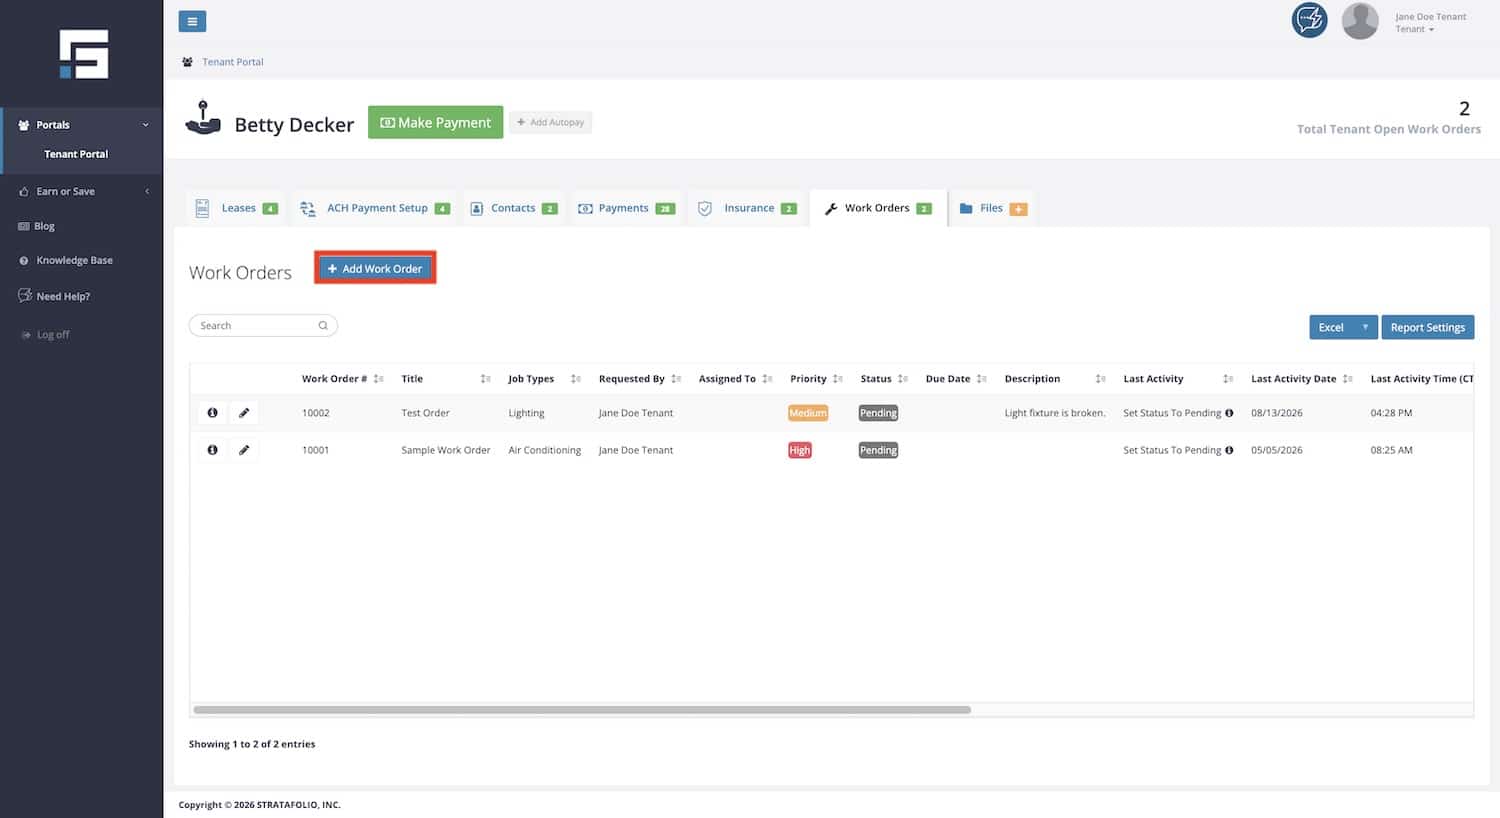
Select the Add Work Order button.
Fill out the work order by completing all the required fields. Required fields have a red asterisk.
General Information About the Work Order Request

- Title – Name of the work order.
- Description – Describe the work that needs to be performed in greater detail.
- Priority – Determine the priority of the work: High, Medium, Low.
- Job Types – There are 19 job type categories ranging from air conditioning to sidewalks to preventive maintenance.
NOTE: You can’t attach files while you fill out the Add Work Order form. Save the work order first, and then add your files from the Files tab. See Adding Files to a Work Order below.
Work Order Details
From here, your tenant will be able to see the work order number, status, who it’s assigned to in maintenance, and much more!
History
Once the work order is created, the Property Manager or Maintenance Team will be able to log in and add comments to the work order, giving you time-stamped updates. This can be accessed by clicking the i icon next to the work order and clicking on the History tab.

Adding Files to a Work Order
You can attach photos, receipts, and other documents to your work order. This gives your property manager or maintenance team a clear picture of the problem and keeps every related file in one place.
Files are added after the work order is created. The Add Work Order form doesn’t include a place to upload files, so save your work order first.
To add files to a work order:
- On the left navigation panel, click Tenant Portal, and then select the Work Orders tab.
- Find your work order and click the i icon on its row.
- Click the Files tab.
- Click the Add A File button.
- Drag and drop your files into the upload box. You can add up to 10 files at a time.
- Type a File Description if you’d like. This is optional, but it helps others understand what the file shows.
- Choose a File Type from the list. This field is required. You can type in the search box at the top of the list to find a type faster.
- Click Add to upload your files.
File Types
Choose the type that best matches your file:
- Bid: A quote or estimate for the work.
- City-related: Permits, notices, or other documents from the city.
- Design: Drawings, plans, or layouts.
- Equipment: Manuals, model labels, or details about a piece of equipment.
- Image: Photos of the issue.
- Receipt: Proof of payment for parts or services.
- Warranty: Warranty papers for equipment or past work.
- Vendor Email: Emails with a vendor about the work.
- Other: Anything that doesn’t fit the types above.